Veterinary Sample Collection Procedure: Sample Types, Tools, and Practical Notes
Veterinary sample collection requires the correct specimen type, tools, timing, labeling, biosafety and transport conditions. This guide covers blood, tissue, swab and fecal samples, with practical steps to reduce contamination and improve diagnostic reliability.
Collecting diagnostic specimens is the first and a very important step in the veterinary diagnostic chain. No matter how advanced a laboratory’s equipment may be, results can still be inaccurate or lose diagnostic value if the wrong sample type is collected, the sample is taken at the wrong time, the volume is insufficient, or storage conditions are not appropriate.
This article outlines a step-by-step veterinary sample collection procedure, including how to select the appropriate sample type, tools to prepare, blood collection techniques for livestock and poultry, and practical notes to help reduce errors in the field.
Professional note: The content below is for general reference only. It does not replace guidance from a veterinarian, the receiving laboratory, product labels, or current regulations. For suspected samples involving dangerous infectious diseases, notifiable diseases, or high-biosecurity-risk specimens, the person collecting the sample should contact the veterinary authority or competent laboratory before collection, packaging, and transport.
Key Takeaways
- Choosing the correct sample type based on the target agent and disease stage is a key factor affecting test accuracy.
- Common sample types include blood, visceral organs and tissues, secretions, swabs, and feces. Each type is suitable for different diagnostic objectives.
- Blood samples must be collected from the correct site, placed in the correct tube type, collected in sufficient volume according to test requirements, and stored properly immediately after collection.
- Parameters such as sample volume, storage temperature, transport time, transport medium, and anticoagulant type should follow the instructions of the receiving laboratory.
- Common field errors include collecting the wrong sample type, using non-sterile tools, incomplete labeling, pooling samples incorrectly, and transporting samples for too long.
Why Does Proper Sample Collection Determine the Accuracy of Veterinary Testing?
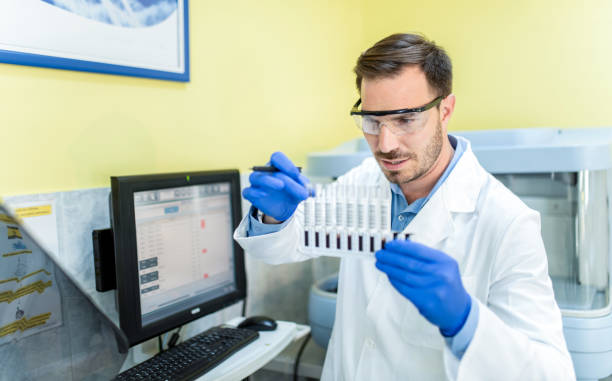
In veterinary diagnostics, the diagnostic specimen is the only input material that the laboratory can analyze.
If a sample is:
- cross-contaminated;
- decomposed;
- not representative of the actual disease situation;
- collected at the wrong time;
- insufficient in volume;
- stored under unsuitable conditions;
the test result may not reflect the true condition of the animal, even if the laboratory testing technique itself is performed correctly.
In livestock and poultry production, many diseases may present with similar clinical signs but require different control and treatment approaches. When sample quality is not adequate, veterinarians or technical managers may have difficulty assessing the disease cause and selecting an appropriate response.
Poor-quality samples may lead to:
- incorrect diagnosis;
- missed detection of the causative agent;
- impact on the veterinarian’s professional decision-making;
- delayed disease control;
- repeated sampling;
- higher testing and labor costs.
Following sampling procedures according to biosafety guidance and laboratory requirements not only protects the accuracy of results but also helps:
- reduce exposure risk for the sampler;
- limit cross-infection between animals;
- ensure that samples arrive at the laboratory in a condition suitable for analysis;
- support information traceability during disease events.
Principles for Selecting the Correct Sample Type Based on Testing Objectives
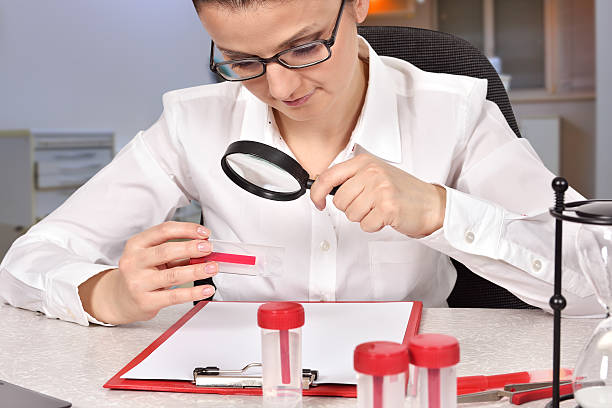
Select Samples Based on the Suspected Agent and Testing Objective
Each group of disease-causing agents has different biological characteristics, so sample type and storage conditions may also differ.
Viruses:
Fresh tissue, secretions, swabs, or blood may be required at an appropriate disease stage. Samples may need to be kept chilled or stored under specific conditions to reduce the risk of viral inactivation. Exact conditions should follow the receiving laboratory’s instructions.
Bacteria:
Swabs, secretions, or tissue from typical lesions are often prioritized. Samples should not come into contact with disinfectants or antibiotics before collection because this may affect bacterial isolation.
Parasites:
Feces, whole blood, or tissue may be used depending on the parasite type and testing objective. Fecal samples usually need to be tested soon or preserved in a suitable solution according to laboratory guidance.
Biochemistry, hematology, or physicochemical tests:
These mainly use whole blood, plasma, or serum. Samples need sufficient volume and should be delivered to the laboratory under suitable conditions.
Clearly identifying the testing objective before sampling helps avoid:
- selecting the wrong sample type;
- using the wrong tube type;
- storing the sample under unsuitable conditions;
- having to collect samples again;
- delaying diagnosis.
Select Samples Based on Disease Stage and Animal Species
Sampling time directly affects the ability to detect the causative agent.
Acute Stage
This is often the appropriate time to:
- isolate viruses;
- isolate bacteria;
- detect antigens;
- perform certain molecular tests;
- collect blood, secretions, or swabs.
Animals at this stage have usually just developed disease, show clear signs, or have fever. However, the optimal sampling time still depends on the specific disease, test type, and laboratory instructions.
Recovery or Chronic Stage
In many cases, the recovery or chronic stage may be more suitable for:
- antibody testing;
- serology;
- assessment of immune response after vaccination;
- determining whether animals have been exposed to a pathogen.
Dead Animals
Samples should be collected as soon as possible after death, with priority given to visceral organs and tissues showing lesions.
Samples from animals that have been dead for too long are often:
- decomposed;
- contaminated by secondary bacteria;
- reduced in diagnostic value;
- difficult for isolation of the original causative agent.
Carcasses should not be left at ambient temperature for too long, especially in hot and humid conditions, because samples may decompose quickly and lose testing value. Specific timeframes should follow guidance from the veterinarian or receiving laboratory.
Animal species also affects:
- sampling site;
- suitable sample type;
- sample volume;
- needle size;
- animal restraint method.
Common Veterinary Diagnostic Sample Types and When to Collect Them
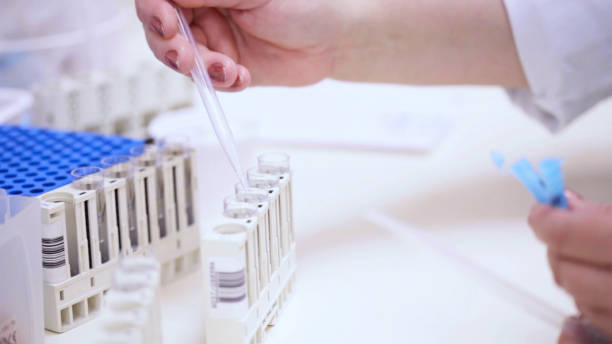
Blood Samples: Whole Blood and Serum
Blood is one of the most commonly used diagnostic specimens in veterinary medicine and can serve many purposes, such as:
- hematology testing;
- biochemistry testing;
- antigen detection;
- detection of certain blood-borne agents;
- antibody testing;
- immune status assessment;
- monitoring professional responses as indicated by a veterinarian.
Depending on the testing objective, the sample may be:
Whole blood:
Blood with cells retained, often used for hematology or some molecular tests when requested by the laboratory.
Serum:
The liquid portion obtained after blood has clotted and been separated, often used for serology or biochemistry.
Plasma:
The liquid portion of anticoagulated blood, used in certain specialized tests.
Blood collection and handling techniques are described in detail in a later section.
Visceral Organ and Tissue Samples: Liver, Spleen, Lymph Nodes, Lungs, and Intestines
Visceral organ and tissue samples are usually collected from dead animals or animals undergoing necropsy for lesion-based diagnosis.
Commonly sampled organs include:
Liver:
May be collected in certain systemic diseases, diseases with liver lesions, or when requested by the laboratory.
Spleen:
May be useful in certain systemic infections or diseases involving the immune system.
Lymph nodes:
Support assessment of immune response and certain specific diseases.
Lungs:
Used for diagnosing respiratory disease, pneumonia, or diseases with respiratory tract lesions.
Intestines:
Used for digestive diseases, enteritis, diarrhea, or diseases with intestinal lesions.
Kidneys:
May be needed in some systemic diseases, metabolic diseases, or suspected poisoning cases.
Brain:
May be used for neurological diseases or diseases suspected to involve specific agents. Brain sampling should be performed by trained personnel, with suitable protective equipment and biosafety conditions.
Each tissue sample should be taken from:
- areas with clear lesions;
- the boundary between diseased tissue and normal tissue;
- areas that have not decomposed;
- areas not contaminated by intestinal contents or the environment.
The tissue sample size should be sufficient to represent the lesion and meet laboratory requirements. Some laboratories may request samples of a few centimeters or a few grams, but this should be confirmed before collection.
For samples used for bacterial or viral isolation:
- place them in sterile bags or containers;
- keep them chilled according to laboratory guidance;
- do not immerse them in formalin;
- do not freeze them on your own if live-agent isolation is needed, unless the laboratory instructs otherwise.
For histology or pathology samples:
- samples may be fixed in 10% neutral buffered formalin according to laboratory guidance;
- the amount of formalin should be sufficient to fully cover the sample;
- samples should not be too thick, so the fixative can penetrate evenly;
- samples fixed in formalin should not be used for bacterial isolation, viral isolation, or certain molecular tests unless requested by the laboratory.
Secretions and Swab Samples
Swabs and secretion samples are often suitable for diagnosing respiratory, digestive, and contact-transmitted diseases.
Common types include:
Oropharyngeal swab:
May be used for certain respiratory diseases in pigs and poultry.
Nasal swab:
Used to detect certain respiratory agents.
Cloacal swab:
Suitable for poultry in certain tests for gastrointestinal or respiratory viruses.
Rectal swab:
May be used for certain intestinal diseases.
Joint fluid:
Supports diagnosis in certain cases of bacterial arthritis.
Tracheal fluid:
Used in certain respiratory diseases.
Vesicular fluid or lesion material:
Used for diseases with characteristic skin or mucosal lesions. If a dangerous infectious disease or notifiable disease is suspected, the veterinary authority or competent laboratory should be contacted before sampling.
After collection, swabs should be:
- placed immediately into a suitable transport medium;
- sealed tightly;
- labeled;
- kept chilled if required by the laboratory;
- transported within the timeframe required by the laboratory.
For many viral tests, samples need to be transferred as soon as possible under appropriate conditions. Transport time may vary depending on the agent, sample type, transport medium, and laboratory guidance.
Fecal Samples
Fecal samples are used to detect:
- intestinal parasites;
- worm eggs;
- coccidial oocysts;
- diarrhea-causing bacteria;
- certain gastrointestinal viruses;
- digestive or absorption disorders.
Sampling method:
- collect enough fresh feces according to test requirements;
- prioritize direct collection from the rectum when appropriate;
- if collecting from the floor, choose freshly passed feces;
- avoid samples heavily mixed with soil, litter, or water;
- place the sample into a clean, sealed container or bag.
Fecal samples should be tested soon. If long-distance transport is needed, a suitable preservation or fixation solution may be used according to laboratory guidance.
Preparation Before Sampling: Tools, Protective Equipment, and Records
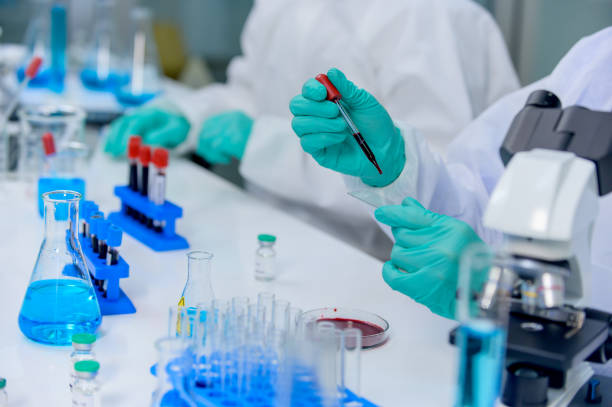
Tools, Supplies, and Personal Protective Equipment
Preparing everything before starting helps avoid interruptions and reduces cross-contamination risk.
| Sample type | Required tools |
| Blood samples | Needles, syringes or vacuum blood collection system, tubes with or without anticoagulant, alcohol swabs, tourniquet, tube rack. |
| Visceral organ and tissue samples | Scalpel, scissors, sterile forceps, sterile bags or containers, formalin container if histology samples are collected. |
| Swab samples | Sterile swabs, tubes containing suitable transport medium. |
| Fecal samples | Fecal collection stick, sample spoon, sterile container or sealed bag. |
| General tools | Gloves, mask, safety goggles, gown, boots, sharps container, medical waste bags. |
| Sample transport | Rigid box or cooler box, cold packs, absorbent material, zip bags, labels, and submission form. |
All tools that come into direct contact with samples must be clean or sterile as required.
- Needles are single-use.
- Swabs are single-use.
- Scalpels, scissors, and forceps should only be reused after proper cleaning and sterilization.
- Needles should not be shared between animals.
For high-risk samples or samples transported between provinces, regions, or countries, regulations on transporting diagnostic specimens and instructions from the receiving unit must be followed.
Sample Labels and Test Request Forms
Sample labels and submission forms should be fully prepared before handover.
Minimum information on the sample submission form:
- farm owner or submitting unit name;
- address;
- contact phone number;
- animal species;
- breed;
- age;
- total number of animals in the herd or flock;
- number of sick animals;
- number of dead animals;
- sample type;
- number of samples;
- date and time of collection;
- clinical signs;
- preliminary lesions;
- vaccination history;
- medicines used;
- testing objective;
- suspected disease;
- storage conditions during transport.
Labels placed directly on tubes, containers, or sample bags should include at least:
- sample code;
- animal name or identification number;
- sample type;
- collection date.
Avoid using:
- ink that fades easily;
- labels that are not moisture-resistant;
- labels placed only on the cap;
- sample codes that do not match the submission form.
Step-by-Step Veterinary Sample Collection Procedure
Step 1: Select the Animal and Sampling Time
Priority should be given to animals that are:
- in the acute disease stage;
- showing clear symptoms;
- febrile;
- untreated or newly treated;
- showing typical lesions;
- representative of the affected group.
Avoid sampling only from:
- animals that have been sick for too long;
- animals treated with antibiotics for many days;
- animals that are nearly recovered;
- carcasses that are heavily decomposed.
If samples are collected from dead animals, collection should be performed as soon as possible after death. Carcasses should not be left at ambient temperature for too long because samples may decompose, become contaminated by secondary bacteria, and lose diagnostic value. Specific timeframes should follow guidance from the veterinarian or laboratory.
The number of animals to sample depends on:
- diagnostic objective;
- herd or flock surveillance objective;
- herd or flock size;
- morbidity rate;
- laboratory requirements.
For surveillance testing, samples often need to be collected from multiple animals to ensure representativeness.
Step 2: Restrain the Animal, Prepare the Site, and Disinfect
Proper animal restraint helps:
- protect the sampler;
- reduce injury to the animal;
- reduce stress;
- improve procedural accuracy;
- reduce the risk of needle breakage or sample spillage.
The blood collection site should be:
- cleaned;
- disinfected with 70% alcohol or a suitable solution;
- allowed to dry before needle insertion.
When collecting swabs or tissue for bacterial isolation, note the following:
- the surrounding skin may be disinfected;
- disinfectant should not contact the lesion area from which the sample is collected;
- disinfectant should not get onto the swab tip;
- the lesion should not be washed with chemicals before sampling if the objective is microbial isolation.
Step 3: Collect the Sample and Control Cross-Contamination
Sampling should be performed according to the correct technique for each specimen type.
Principles for controlling cross-contamination:
- change gloves or disinfect hands between animals;
- use separate tools for each animal;
- re-sterilize tools if reuse is necessary;
- do not place sterile tools on dirty surfaces;
- prevent samples from one animal contacting samples from another;
- close sample containers immediately after collection.
If conditions allow, collect samples in order from mildly suspected animals to severely affected animals to reduce cross-contamination risk.
High-risk suspected samples should be kept separate.
For tissue samples:
- separate tools may be used for each organ;
- avoid using a knife that has cut intestines to collect liver, spleen, or lung samples;
- collect sterile samples first, then collect histology samples.
Step 4: Use Triple Packaging, Seal, Label, and Store Temporarily
For diagnostic specimens with biological risk, biosafety practice often recommends triple packaging.
Layer 1: Primary Sample Container
- Tube, container, or bag holding the sample directly.
- Sealed tightly.
- Leak-proof.
- Sealed with suitable leak-resistant and moisture-resistant materials according to laboratory or carrier instructions.
- Labeled directly.
Layer 2: Secondary Container
- Sealed zip bag or rigid plastic box.
- Absorbent material placed around the primary container.
- Able to hold the full liquid volume if Layer 1 leaks.
- Marked with sample code or batch information.
Layer 3: Outer Transport Packaging
- Cooler box.
- Rigid transport box.
- Suitable cold packs or ice packs.
- Able to maintain storage conditions throughout transport.
- Able to withstand normal handling impact.
The test request form should be:
- placed in a separate waterproof bag;
- placed between Layer 2 and Layer 3;
- not placed directly with the sample;
- protected from melted ice or leakage.
Many diagnostic specimen types may be temporarily stored under chilled conditions while awaiting transport. However, this does not apply to every sample type or every test. Instructions from the receiving laboratory should take priority.
Step 5: Handover and Control Transport Time
Transport time and conditions depend on sample type, suspected agent, and testing method. The notes below should be treated only as general practical references and should be confirmed with the receiving laboratory.
Swabs and secretions:
Usually need to be transferred as soon as possible under suitable conditions. Specific timing depends on the test and transport medium.
Whole blood:
Should be transferred and processed soon. Storage time depends on the anticoagulant and test parameters.
Separated serum:
May be stored chilled short-term or frozen for long-distance transport, depending on test requirements.
Visceral organ tissues:
Should be transferred early under chilled conditions. Samples should not be allowed to decompose or become contaminated.
Samples for viral isolation, molecular testing, or specialized testing:
May require specific storage conditions. Samples should not be frozen or exposed to repeated freeze-thaw cycles unless instructed by the laboratory.
Fecal samples:
Should be tested soon or preserved according to laboratory requirements.
During handover, confirm:
- number of samples;
- sample codes;
- package condition;
- transport conditions;
- collection time;
- receipt time;
- test request form.
Specific Procedure and Technical Parameters for Veterinary Blood Samples
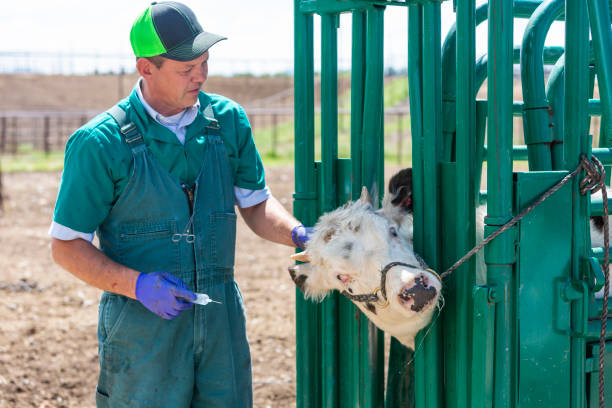
Blood Collection Sites and Techniques in Livestock
In Pigs
Common blood collection sites include:
Ear vein:
Suitable for adult pigs and often used when a small to moderate blood volume is needed. The head should be restrained, and the vein should be made prominent.
Jugular vein:
Can provide a larger blood volume and is suitable when multiple test parameters are needed. It should be performed by an experienced person.
Orbital sinus:
May be used in piglets or when other sites are difficult to access, but it must be performed by trained personnel to avoid eye injury.
Anterior vena cava:
May be used in certain professional procedures and requires good technique and restraint.
In Cattle and Goats
The jugular vein is a common blood collection site because it is:
- easy to identify;
- suitable for collecting sufficient volume;
- relatively easy to control when the animal is restrained;
- suitable for many test parameters.
Blood Collection Sites and Techniques in Poultry
In chickens and ducks, common blood collection sites include:
Wing vein:
Often used in adult poultry when a suitable blood volume is needed for testing.
Jugular vein:
May be used in some cases when the wing vein is difficult to access or when more blood is needed, but it should be performed by an experienced person.
Cardiac puncture:
This is an invasive procedure and should only be performed by trained personnel or veterinarians under suitable conditions, such as in poultry anesthetized under an approved procedure or after slaughter. It should not be used as a routine procedure in live animals.
When collecting blood from the wing vein:
- restrain the bird properly;
- extend the wing;
- identify the vein on the inner side of the wing;
- disinfect the collection site;
- use a needle appropriate for the bird’s size and required blood volume;
- draw blood slowly to reduce vessel rupture and hemolysis;
- apply cotton pressure after removing the needle.
The amount of blood collected in one session must be limited to ensure animal safety and depends on species, body condition, and testing objective. The sampler should follow guidance from a veterinarian, animal welfare procedure, or laboratory. Large blood volumes should not be collected without professional guidance.
Technical Parameters for Blood Samples
The parameters below are for reference only. Sample volume, tube type, anticoagulant, storage temperature, and processing time should be confirmed with the laboratory before sampling.
| Parameter | Reference recommendation |
| Blood sample volume | Depends on animal species, animal size, number of tests, and laboratory requirements. |
| EDTA tube | Commonly used for whole blood and hematology testing. |
| Tube without anticoagulant | Commonly used for serum separation. |
| Heparin tube or other anticoagulant tubes | Should only be used when suitable for the test parameter and accepted by the laboratory. |
| Whole blood storage | Follow laboratory requirements; whole blood for hematology generally should not be frozen. |
| Serum storage | May be stored chilled short-term or frozen if needed, depending on test requirements. |
| Blood sample processing time | Should be processed as soon as possible; specific timing depends on the test parameter and storage conditions. |
Note: Tube cap colors may differ by manufacturer, so the tube label and anticoagulant type should be checked instead of relying only on cap color.
After blood is collected into an anticoagulant tube:
- gently invert the tube vertically according to the tube manufacturer’s or laboratory’s instructions;
- do not shake vigorously;
- do not allow foam to form;
- do not freeze samples used for hematology.
Vigorous shaking may cause hemolysis and distort many test parameters.
Distinguishing Handling of Whole Blood and Serum
Whole Blood
Whole blood:
- is usually collected into a suitable anticoagulant tube;
- is used for hematology;
- may be used for some molecular tests if requested by the laboratory;
- should be stored according to laboratory guidance;
- should not be frozen if used for hematology;
- should be transported quickly.
Sample type and anticoagulant for molecular testing must follow laboratory instructions. Some protocols may require whole blood, serum, swabs, tissue, or other sample types depending on the agent to be detected. Anticoagulant tubes or transport media should not be selected without laboratory confirmation because some anticoagulants or storage conditions may affect test results.
Serum
The usual handling process includes:
- collect blood into a tube without anticoagulant;
- allow the blood to clot fully according to technical guidance;
- separate serum using a suitable method;
- transfer serum into a clean tube;
- store chilled or frozen according to test requirements.
If centrifugation is used, speed and time should follow laboratory instructions or equipment guidance. Revolutions per minute depend on the machine type and rotor radius, so one fixed setting should not be treated as a universal standard.
Serum is commonly used for:
- ELISA;
- HI;
- antibody testing;
- biochemistry testing;
- immune assessment.
Whole blood should not be frozen for hematology or most biochemistry tests unless the laboratory instructs otherwise.
Common Sampling Errors and How to Prevent Them
Wrong Sample Type, Wrong Timing, or Insufficient Volume
Common errors include:
- collecting the wrong sample type for the test requirement, such as using serum when the laboratory requires whole blood, or using the wrong tube or transport medium;
- collecting samples after the animal has passed the appropriate stage for detecting the agent;
- collecting samples after many days of antibiotic treatment without recording medicine information;
- collecting insufficient sample volume;
- using the wrong tube type;
- sampling from an animal that is not representative of the herd or flock.
How to prevent these errors:
- identify the testing objective;
- communicate with the laboratory before sampling;
- confirm sample type;
- confirm sample volume;
- confirm tube type;
- confirm storage conditions.
Non-Sterile Tools, Incomplete Labeling, or Incorrect Sample Pooling
Common errors include:
- reusing needles;
- sharing swabs;
- not changing gloves;
- labels becoming wet or faded;
- missing collection date and time;
- sample codes not matching the submission form;
- pooling samples from multiple animals without guidance.
Samples should only be pooled when:
- the laboratory accepts pooling;
- the objective is herd or flock screening;
- there is a specific pooling procedure;
- the number of animals is recorded;
- individual animal codes are recorded;
- the maximum number of samples per pool follows guidance.
Pooling may affect the ability to detect an agent if the pathogen load is low. Therefore, samples should not be pooled arbitrarily for individual diagnosis. If a pooled sample is positive, individual animals may need to be sampled again to identify the affected animal.
Incorrect Storage and Transport Conditions
Common errors include:
- leaving samples at ambient temperature for too long;
- not preparing enough cold packs;
- ice packs melting during transport;
- freezing tissue samples when live bacterial isolation is needed;
- allowing blood tubes to contact ice directly;
- tubes breaking due to insufficient cushioning material;
- sample leakage;
- test request forms becoming wet.
How to prevent these errors:
- prepare the cooler box before sampling;
- pre-chill cold packs if cold transport is needed;
- estimate transport time;
- use cushioning material;
- monitor temperature if possible;
- hand over samples early;
- contact the laboratory if transport distance is long.
Field Checklist for Veterinary Sample Collection
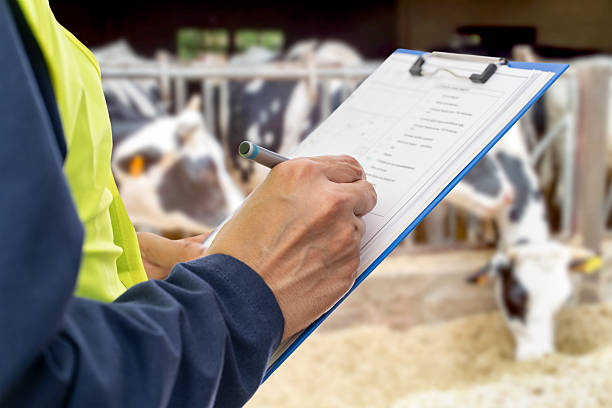
Before Sampling
- The testing objective has been identified.
- The laboratory has been contacted to confirm sample type.
- The correct tubes and transport media have been prepared.
- Labels and the sample submission form have been prepared.
- Sterile tools have been prepared.
- Adequate personal protective equipment has been prepared.
- Cooler box and cold packs have been prepared if samples require cold transport.
- Representative animals and the appropriate sampling time have been selected.
During Sampling
- Animals are properly restrained.
- The sampling site is cleaned and disinfected where appropriate.
- Disinfectant does not contact the swab sample or lesion area to be cultured.
- Separate tools are used for each animal.
- Gloves are changed or hands are disinfected between animals.
- Sufficient volume is collected according to laboratory requirements.
- Sample containers are closed immediately after collection.
- Samples are labeled immediately in the field.
After Sampling
- Sample codes have been matched against the submission form.
- Samples have been packaged using the triple-packaging principle where appropriate.
- Absorbent material is included.
- The submission form is placed in a separate waterproof bag.
- Samples are stored under suitable conditions.
- Date and time of collection have been recorded.
- Samples are handed over within the timeframe required by the laboratory.
- Needles and sharps are disposed of properly.
Frequently Asked Questions About Veterinary Sample Collection

Can samples from multiple animals be pooled in the same tube?
Yes, but only when:
- the laboratory accepts pooling;
- the objective is herd or flock screening;
- it is not for individual diagnosis;
- clear guidance is available on the number of animals in one pooled sample;
- pooling information is fully recorded.
Pooling may reduce the ability to detect an agent if pathogen load is low. If a pooled sample is positive, individual animals often need to be sampled again to identify the affected animal.
What is the minimum blood volume required, and which tube should be used?
The blood volume needed depends on the animal species, animal size, number of tests, and laboratory requirements.
Tube type also depends on the testing objective:
- EDTA tubes are commonly used for whole blood and hematology testing.
- Tubes without anticoagulant are commonly used for serum separation.
- Heparin tubes or other anticoagulant tubes should only be used when suitable for the test parameter and accepted by the laboratory.
Tube cap colors may differ by manufacturer, so the tube label should be read and the tube type should be confirmed with the laboratory before sampling.
What information should be written on the sample label and submission form?
A sample label should include at least:
- sample code;
- animal name or identification number;
- sample type;
- collection date and time.
The submission form should also include:
- farm owner information;
- animal species;
- number of sick and dead animals;
- clinical signs;
- lesions;
- vaccination history;
- medicines used;
- testing objective;
- storage conditions.
Missing information may prevent the laboratory from processing samples correctly or make results difficult to interpret.
How soon should samples be delivered to the laboratory?
Transport time depends on the sample type, suspected agent, transport medium, and testing method. As a general principle, samples should be delivered as soon as possible and stored according to the receiving laboratory’s instructions.
Different sample types, such as swabs, secretions, whole blood, serum, visceral organ tissues, or feces, may have different temperature and transport-time requirements. Therefore, before sampling, the person in charge should confirm directly with the laboratory to prepare the correct tube type, transport medium, and storage plan.
Can one sample be used for multiple tests?
In some cases, yes, if:
- the volume is sufficient;
- the sample type is suitable;
- storage conditions are compatible;
- the laboratory confirms it.
However, some tests require different tube types or transport media. Farms should discuss this in advance so enough samples are prepared, avoiding repeat sampling or reduced sample quality.
Should samples be collected after animals have received antibiotics?
Samples may still be collected, but bacterial isolation results may be affected.
If professional conditions allow, samples should be collected before treatment begins. However, treatment decisions should still follow the veterinarian’s or technical manager’s judgment, especially in severe cases or situations with risk of spread.
If animals have already received medicine, record clearly:
- medicine name;
- dosage;
- duration of use;
- time of the final dose.
This information helps the laboratory and veterinarian interpret results more accurately.
Improve Veterinary Sampling and Diagnostic Workflows at VIETSTOCK 2026
Reliable diagnosis begins with representative animal selection, correct specimen collection, contamination control, accurate labelling, and complete field records. When these steps are inconsistent, farms and laboratories may face repeated sampling, delayed disease identification, and additional operating costs.
At VIETSTOCK 2026, veterinarians, farm technicians, livestock producers, laboratories, and animal-health businesses can explore solutions supporting the veterinary diagnostic chain from field collection to laboratory analysis.
Visitors can:
- Explore blood-collection systems, sterile swabs, specimen containers, transport media, and field sampling kits.
- Discover animal-identification and digital record solutions that connect each specimen with the correct animal, herd, flock, and clinical history.
- Review protective equipment, field biosafety tools, and packaging solutions for diagnostic specimens.
- Connect with veterinary laboratories, diagnostic companies, animal-health businesses, and technology providers.
- Learn about diagnostic equipment and disease-monitoring solutions for livestock and poultry production.
- Exchange practical experience on standardizing collection procedures, submission forms, and laboratory handover.
Expected to feature more than 300 brands, over 10,000 sqm of exhibition space, and 13,000 trade visitors from more than 40 countries and territories, VIETSTOCK 2026 creates opportunities for stakeholders to improve diagnostic workflows and build specialized connections across the livestock and animal-health value chain.
Alongside the exhibition and business-networking activities, VIETSTOCK 2026 will also organize an On-Farm Seminar Series, bringing practical knowledge on herd and flock management, disease prevention, biosecurity, and livestock-production efficiency to key livestock regions.
Date: 21–23 October 2026
Venue: Saigon Exhibition and Convention Center – SECC, 799 Nguyen Van Linh Street, Tan My Ward, Ho Chi Minh City, Vietnam
Event website: https://www.vietstock.org/en/
👉 Register to visit VIETSTOCK 2026 and explore veterinary sampling, diagnostics, animal identification, and disease-monitoring solutions:
https://www.vietstock.org/en/online-registration-2/
👉 Learn more about the VIETSTOCK 2026 On-Farm Seminar Series:
https://www.vietstock.org/en/event-features/vietstock-2026-livestock-roadshows-bringing-industry-knowledge-to-key-livestock-regions/
CONTACT INFORMATION:
Exhibiting: Ms. Sophie Nguyen – [email protected]
Visitor Support: Ms. Phuong – [email protected]
Marcom Support: Ms. Anita Pham – [email protected]