Disease Prevention for Newly Hatched Chicks During the First 2 Weeks
A practical guide to disease prevention for newly hatched chicks during the first two weeks, covering brooding temperature, clean water, starter feed, hygiene, vaccination guidance, warning signs, and daily care checklists.
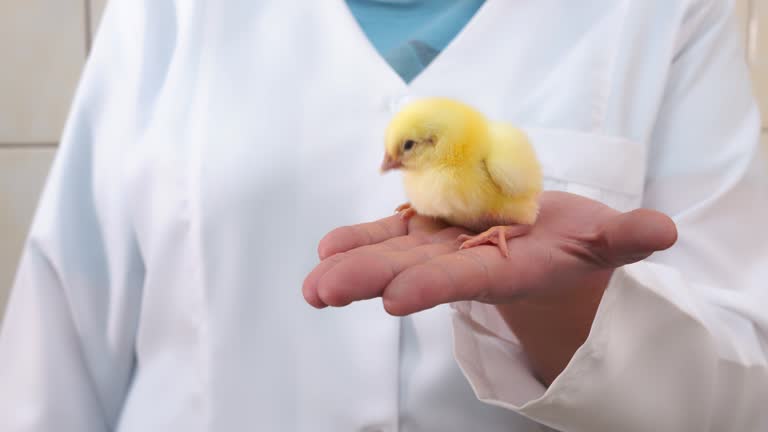
Disease prevention for newly hatched chicks begins with understanding their immature immune system, limited ability to regulate body temperature, and low tolerance to environmental stress.
This is why the first 2 weeks after hatching — especially the first 7 days — are often considered a high-risk period for losses in the production cycle. In practical farming, chicks may become weak or die quickly if the brooding area is not warm enough, drinking water is not clean, litter is damp, feed is unsuitable, or chick quality is not assured.
However, many cases of early chick mortality or poor growth can be significantly reduced if farmers set up the right care process before the chicks arrive.
Disease prevention for newly hatched chicks should not start with veterinary medicines. It should begin with basic management: a warm brooding area, clean drinking water, suitable feed, dry litter, proper hygiene, and flock observation several times a day. Vaccines and veterinary medicines are only effective when used at the right time, using the right product, and according to veterinary advice or the manufacturer’s instructions.
This article explains disease prevention for newly hatched chicks throughout the first 14 days, with practical care steps, monitoring checklists, and answers to common questions.
Quick Summary
- Chicks are highly vulnerable to disease during the first 7 days because their immune system is still immature. Keeping them warm, providing clean water, and considering electrolyte supplementation should be prioritized. The vaccination schedule should be arranged according to veterinary advice — it should not be skipped or adjusted without guidance.
- Three key factors strongly affect survival rate: brooding environment, nutrition and water intake, and proactive disease prevention. Missing any one of these factors often increases the risk of losses.
- A reference brooding temperature is around 33–35°C during the first 3 days, then gradually reduced by week. Flock behavior is the most accurate way to assess the actual temperature experienced by chicks.
- Vaccination schedules and preventive medicine use should be discussed and confirmed with a local veterinarian before implementation.
- The checklist and summary table for days 1–3 / 4–7 / 8–14 at the end of this article help farmers monitor chicks continuously without missing important steps.
Why Is Disease Prevention for Newly Hatched Chicks Critical During the First 2 Weeks?
Common Diseases and Causes of Early Mortality in the First Week
From hatching to around days 7–10, chicks are transitioning from nutrients provided by the egg yolk to external feed and drinking water. During this period, the digestive system is not yet stable, the respiratory system is easily affected, and the ability to resist pathogens remains very limited.
Common health issues in the first week include:
- Omphalitis: This occurs when the navel has not fully healed and becomes infected through a damp, dirty environment or during the hatching process.
- Pullorum disease: This may be related to Salmonella pullorum, with common signs such as white droppings, pasty vent, loss of appetite, rapid weakening, and a high risk of death in chicks. However, dropping color is only an initial indicator. Veterinary assessment or appropriate testing is needed to confirm the cause, because diarrhea in chicks may result from many factors, including cold stress, dirty water, poor-quality feed, transport stress, or bacterial infection.
- Chronic respiratory disease (CRD) and respiratory signs such as wheezing or gasping: These may be related to pathogens and often become more serious when the brooding area is exposed to drafts, dampness, dirty litter, high ammonia levels, or excessive stocking density. When many chicks show signs such as breathing difficulty, wheezing, sneezing, or loss of appetite, farmers should isolate affected chicks and contact a veterinarian for cause assessment.
- Newcastle disease and Gumboro disease: These are dangerous viral diseases that may affect chicks, especially in areas where the diseases are present and where the flock is not vaccinated or is vaccinated improperly. Gumboro often causes more noticeable losses at later stages, commonly from 3 weeks of age onward depending on maternal antibody levels. Marek’s disease also usually appears later than the first week. During the first week, omphalitis, early bacterial infection, and chick quality issues often play a more significant role.
- Death due to cold or heat stress: This is not a disease, but it is a very common cause of early mortality in small-scale farms that have not yet controlled brooding temperature properly.
Most of the causes above can be proactively prevented to a certain extent. Their shared feature is that they appear quickly, progress quickly, and cause major losses if detected late.
Three Key Factors Affecting Chick Survival Rate: Environment – Nutrition – Proactive Disease Prevention
Disease prevention for newly hatched chicks during the first 2 weeks should focus on three key factors:
- Environment: Stable temperature, moderate humidity, no drafts, and clean, dry litter. This factor has a direct and immediate impact on chick health.
- Nutrition: Clean drinking water, feed suitable for each stage, timely electrolyte and vitamin support, and avoidance of damp, moldy, or excessive feed.
- Proactive disease prevention: Vaccination schedules, hygiene and disinfection, and control of people and objects entering the house. These measures are not intended to be applied only when chicks are already sick; they should be implemented early and continuously.
These three factors interact with each other. A good environment helps feed digestion become more effective. Adequate nutrition supports better vaccine response. Proactive disease prevention reduces the burden on both the environment and the chicks’ natural resistance.
Brooding Conditions for Disease Prevention for Newly Hatched Chicks
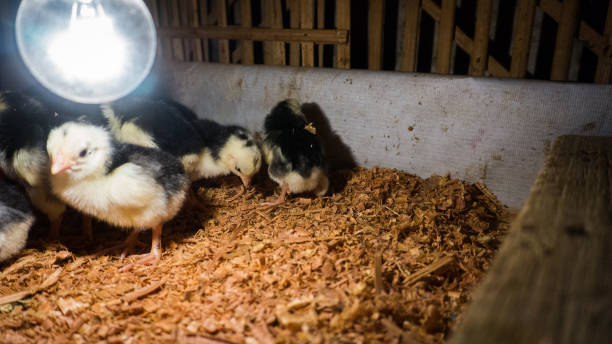
Preparing the Brooding Area Before Chicks Arrive: Equipment, Cleaning, and First Disinfection
The brooding area should be prepared and disinfected at least 48 hours before chicks arrive. Placing chicks into a poultry house that has just been disinfected and still has a strong chemical smell may irritate their respiratory tract.
Preparation checklist:
- A brooding area or chick house that has been washed, dried, and disinfected.
- Litter, usually new, dry, clean rice husk, around 5–8 cm thick.
- Brooder lamps or infrared lamps placed at the correct height to provide suitable heat.
- A thermometer placed low, close to the litter surface, to measure the actual temperature experienced by chicks.
- Drinkers and feeders that have been washed, disinfected, and dried.
- Draft shields if the house is open to wind, or curtains to adjust ventilation.
- For small-scale farms, a circular brooder guard made of metal sheet or plastic with a radius of around 1–1.5 m per 100 chicks is usually sufficient to retain heat and prevent chicks from moving into colder areas.
Brooding Temperature for Chicks by Stage During the First 2 Weeks and How to Read Flock Behavior
Temperature is the most important factor during the brooding stage. Chicks still have poor body temperature regulation during the first 2 weeks, so farmers need to actively control brooding temperature and monitor flock response frequently.
The table below is for reference only for common production models. It should be adjusted according to the breeder’s technical recommendations, the actual housing system, and veterinary guidance.
| Stage | Reference Temperature Under the Heat Source | Reference Temperature at the Edge of the Brooding Area |
| Days 1–3 | 33–35°C | 28–30°C |
| Days 4–7 | 31–33°C | 26–28°C |
| Days 8–14 | 28–31°C | 24–26°C |
However, a thermometer is only a reference tool. Flock behavior is the most practical indicator:
- Chicks huddle tightly near the heat source and pile on top of each other → too cold; increase heat or lower the brooder lamp.
- Chicks move far away from the heat source, breathe with open mouths, or spread their wings → too hot; reduce heat or raise the brooder lamp.
- Chicks are evenly distributed inside the brooder ring, active, and eating and drinking normally → temperature is suitable.
A common mistake is relying only on the thermometer without observing chick behavior, which can lead to temperature adjustments that do not match the actual housing conditions.
Humidity, Ventilation, Draft Prevention, and Lighting for Newly Hatched Chicks
Humidity: A reference range of around 60–70% may be used, but it should be adjusted according to house conditions, litter condition, season, and the breeder’s technical recommendations.
If the house is too dry, chicks may experience respiratory irritation or discomfort. If humidity is too high, litter becomes wet more easily, creating conditions for bacteria, mold, and toxic gases to develop.
Ventilation: Air should circulate gently, but direct drafts into the brooding area must be avoided.
Drafts are among the key risk factors linked to respiratory problems in chicks during the first week, especially when combined with high stocking density or damp litter.
Lighting: Many practical guides recommend almost continuous lighting during the first 3 days, around 23 hours per day, so chicks can easily find feeders and drinkers.
From day 4 onward, lighting may be reduced to around 18–20 hours per day. However, this should be adjusted according to breeder guidance, production model, and actual farm conditions.
Stocking Density in the Brooding Area and How to Handle Wet Litter
Stocking density for chicks during brooding is often recommended at around 20–30 chicks/m², depending on breed, open or closed housing systems, and breeder recommendations. Excessive density increases local heat, raises ammonia levels, and increases the risk of respiratory and digestive disease outbreaks.
For litter management:
- Check litter moisture at least once per day, especially around drinkers.
- When litter becomes wet, caked, or has a strong ammonia smell, loosen it immediately and add dry rice husk on top. Do not leave wet litter overnight.
- Avoid using long straw or damp sawdust as litter for chicks because they are prone to mold and are difficult to turn.
Water and Nutrition in Disease Prevention for Newly Hatched Chicks
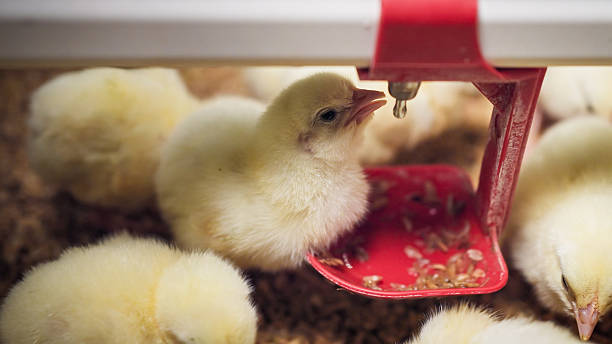
How Soon Should Newly Hatched Chicks Be Given Water and Feed?
After hatching, chicks may still use part of the nutrients from the egg yolk for the first 1–2 days. However, drinking water should be provided immediately when chicks are placed in the brooding area. Farmers should not wait until chicks appear thirsty.
Farmers may spread feed on paper or shallow trays around 3–6 hours after chicks have first received water. This stimulates natural feeding behavior and helps the digestive tract start functioning early.
Principles for Clean Drinking Water: Water Type, Water Replacement, Number and Placement of Drinkers
- Use clean water with no strong chlorine smell. If tap water is used, it should be left overnight or aerated before being given to chicks.
- During the first 2–3 days, electrolytes and vitamins may be added to drinking water according to product label instructions, especially for flocks transported over long distances or showing signs of post-hatch stress. Consult a veterinarian about the appropriate product and dosage.
- Replace water at least twice per day and clean drinkers each time to prevent algae and bacterial buildup.
- As a reference, around one small 1-liter drinker for 50–70 chicks may be used, but this should be adjusted so that chicks always have access to clean water at all times.
- Place drinkers near the heat source but not directly under the lamp to prevent rapid evaporation and to reduce the risk of chicks knocking them over while gathering for warmth.
Suitable Feed for Chicks During the First 2 Weeks and How to Avoid Waste, Dampness, and Mold
Use compound feed specifically formulated for chicks, usually labeled “Starter” or “0–21 days,” with nutrient levels suitable for the early stage. Do not use feed for older chickens or self-mixed feed that does not ensure balanced nutrition.
Feeding principles:
- Spread feed in a thin layer on trays or firm paper during the first 3 days so chicks can easily see and eat it. From day 4 onward, gradually switch to specialized feeders.
- Feed small amounts several times instead of pouring out a large amount at once. Feed left in feeders for too long absorbs moisture, becomes moldy easily, and becomes a source of bacterial contamination.
- Do not use feed that has been stored too long, become clumped, or developed an unusual smell. Moldy or damp feed is a clear risk factor for diarrhea and digestive disorders in chicks.
Electrolytes, Vitamins, Digestive Enzymes, and Probiotics: When to Use and for How Long?
- Electrolytes: These may be considered during the first few days, especially when chicks have been transported over long distances, show signs of stress, or have mild dehydration. Use according to product instructions and veterinary advice. Avoid overdosing or combining multiple products at the same time.
- Vitamin C or B-complex: These may be considered in situations involving stress, poor feed intake, or post-transport recovery, depending on flock condition and product instructions. They should not be used for prolonged periods or combined with many supplements without veterinary advice.
- Digestive enzymes or probiotics: These may be considered when chicks are stressed, changing feed, digesting poorly, or showing mild digestive disturbance. Use according to product instructions. They should not be used mechanically as a routine if the flock is healthy, eating and drinking well, and droppings are normal.
Note: Do not mix many products together at the same time without veterinary guidance. Some products may interact or reduce each other’s effectiveness when mixed together. Always check the instructions for each product before combining them.
Disease Prevention for Newly Hatched Chicks by Stage During the First 2 Weeks

Days 1–3: Stabilization After Hatching and Transport – Prioritize Warmth, Electrolyte Support, and Drinking Stimulation
This is the most vulnerable stage for chicks. Priority tasks include:
- Place chicks into a pre-warmed brooding area and check that the temperature under the heat source is around 33–35°C.
- Provide water immediately. Electrolytes may be added if appropriate. Gently help chicks find drinkers, and gently bring the chick’s beak close to the water if needed.
- After 3–6 hours, begin spreading a thin layer of starter feed on trays or paper.
- Continuously observe flock behavior to adjust temperature in time.
- Avoid noise and do not allow strangers into the house during this period.
- Check chick navels. If chicks have unhealed, swollen, red, or wet navels, separate them and contact a veterinarian.
- In small-scale farming without a specific treatment protocol, antibiotics are generally not recommended during the first 3 days if there are no clear signs of disease. A stable environment and nutritional support should be prioritized. Any decision to use antibiotics should follow veterinary instructions.
Days 4–7: Feeding Development, Gut Stabilization, and Dropping Monitoring for Early Detection
From day 4, chicks usually begin eating better. This is the time to switch from flat trays to specialized feeders. Some farms may also start the first vaccination schedule during this period, depending on the production model and local veterinary recommendations.
Vaccination note: Marek’s vaccine is often administered at the hatchery when chicks are 1 day old. During days 4–7, some farms may begin Newcastle, IB, or other vaccines according to the schedule confirmed with a veterinarian.
Main tasks:
- Gradually reduce temperature to around 31–33°C, adjusting according to flock behavior.
- Monitor droppings every day. Normal droppings are relatively firm and may be grey-green or light brown. White droppings, watery droppings, or droppings mixed with blood are signs that require closer monitoring and veterinary contact.
- Clean feeders and drinkers twice per day.
- Vaccinate according to the schedule confirmed with a veterinarian if the appropriate time has arrived.
- Check litter and loosen it if it becomes caked.
Days 8–14: Adjust Temperature, Density, Feeders and Drinkers, and Strengthen Resistance
During the second week, chicks are more stable but still need close management:
- Continue reducing temperature according to the schedule, down to around 28–31°C. If the weather is warm, temperature may be reduced faster. If the weather is cold, maintain a slightly higher temperature than the reference level according to actual flock behavior.
- Adjust stocking density if chicks are growing well: expand the brooder ring or increase the housing area according to chick growth.
- Add more feeders and drinkers when more chicks gather around each feeding or drinking point.
- Administer the next vaccine if required by the schedule and confirmed by a veterinarian.
- Gradually reduce electrolytes and vitamins in drinking water, and use probiotics periodically only if needed.
- Continue monitoring droppings, feeding behavior, drinking behavior, and flock development.
Hygiene, Disinfection, and Biosecurity During the First 2 Weeks
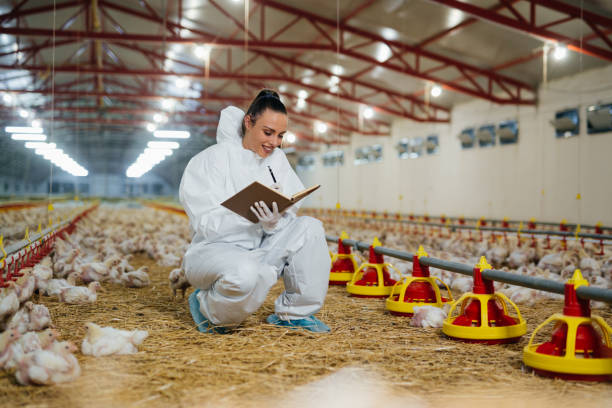
Daily Hygiene Schedule: Feeders, Drinkers, and Litter
Daily hygiene cannot be skipped, even when the flock appears healthy:
- Drinkers: Wash and replace water at least twice per day. Use a small brush to clean the inside of drinkers, especially areas where water directly contacts the chicks’ beaks.
- Feeders: Remove leftover or damp feed and clean feeders before each new feeding. Do not mix old feed with new feed.
- Litter: Check 1–2 times per day, especially near drinkers. Loosen caked areas and add dry rice husk when litter becomes damp.
Safe Use of Disinfectants for Chicks and Suggested Spraying Frequency
Choose disinfectants suitable for use in houses with chicks. Avoid products that strongly irritate the respiratory tract. Some products containing iodine or glutaraldehyde may be used according to the manufacturer’s technical instructions and local veterinary advice. Products should be approved for use in houses with chicks, and the recommended dilution rate must be followed.
Suggested disinfection frequency is for reference only and should be adjusted according to disease risk, manufacturer instructions, and veterinary guidance:
- Outside the house and walkways: Around 1–3 times per week may be considered, depending on local disease pressure.
- Inside the house with chicks present: Only when necessary, using products approved for use when chicks are present. Spray when chicks are resting and do not spray directly onto them.
- Equipment disinfection: Each time before new equipment is brought into the house.
Controlling People, Equipment, and Items Entering the House
Biosecurity is a core part of disease prevention for newly hatched chicks because it minimizes the introduction of pathogens from outside into the house:
- Limit people entering the house, especially people coming from other farms.
- Anyone entering the house should change footwear, wear protective clothing, and step through a disinfectant footbath.
- Equipment brought in from outside should be disinfected first.
- Do not allow wild birds, rats, cats, or other animals into the poultry house.
- Do not bring chickens from other sources into the brooding area when chicks are already present.
Vaccination and Disease Prevention for Newly Hatched Chicks During the First 14 Days
Principles for Developing a Vaccination Schedule Suitable for the Production Model and Local Disease Situation
There is no single fixed vaccination schedule suitable for all production models and all regions. A vaccination schedule should be built based on:
- Chicken type: Industrial broilers, free-range chickens, and local breeds may require different vaccination schedules.
- Local disease situation: Diseases circulating in the area determine which vaccines should be prioritized.
- Maternal antibody level: Chicks from fully vaccinated breeder flocks may have better passive immunity, which affects the timing of initial vaccination.
- Recommendations from local veterinarians or chick suppliers: These should be consulted before chicks are brought in.
Always contact a veterinarian or local animal health officer to develop a vaccination schedule suitable for the farm’s specific conditions before implementation.
Reference Vaccination Schedule During the First 14 Days and Proper Eye-Drop or Drinking-Water Administration
The table below is only an example of a common vaccination schedule in many areas. The actual schedule must be confirmed with a veterinarian and adjusted according to the vaccine type from each manufacturer, local disease situation, and flock characteristics.
| Age | Vaccine That May Be Considered | Important Notes |
| Day 1 at the hatchery | Marek’s vaccine if included in the breeder/farm program | Usually administered at the hatchery; confirm whether chicks have already been vaccinated when receiving them. |
| Around days 5–7 | First Newcastle vaccine if included in the vaccination program | The administration method may be eye drop, nasal drop, or drinking water depending on the vaccine type. Do not apply without guidance. |
| Around days 7–14 | Gumboro vaccine if the area is at risk and the vaccination program requires it | Timing depends heavily on maternal antibodies and disease pressure; veterinary confirmation is needed. |
| Around day 14 or later | Newcastle booster or other vaccines if required by the farm schedule | Do not vaccinate when the flock is sick, under severe stress, or when previous vaccination history is unclear. |
Eye-drop technique: Hold the chick gently, place one drop of vaccine at the corner of the eye, and wait for the chick to blink so the vaccine is absorbed before release. Do not allow the chick to struggle strongly immediately after administration.
Drinking-water technique: When using vaccines through drinking water, read the product label carefully. Water used to mix vaccines must be clean and free of disinfectants or chlorine that may affect vaccine activity. Some procedures may require short water withdrawal before vaccination so the flock drinks more evenly, but the specific duration should follow the vaccine manufacturer’s instructions and veterinary advice.
Common Vaccination Mistakes and When to Call a Veterinarian Instead of Handling the Situation Yourself
Common vaccination mistakes include:
- Mixing vaccines with water containing chlorine, reducing vaccine activity.
- Placing vaccines into drinkers before the vaccine has fully dissolved.
- Storing vaccines at the wrong temperature, such as leaving them in the sun or failing to use ice packs during transport.
- Vaccinating when the flock is sick or stressed.
- Not providing enough drinkers for all chicks to drink while the vaccine is still active.
When to call a veterinarian:
- Chicks show severe abnormal reactions 2–3 days after vaccination, such as widespread loss of appetite or sudden deaths.
- Signs suggest Newcastle disease, Gumboro disease, or widespread respiratory disease in the flock.
- Mortality increases unusually compared with the previous day, multiple deaths occur within the same day, or many chicks become weak, stop eating, develop diarrhea, wheeze, or breathe with difficulty without a clear cause. For small flocks, even a few deaths or unusual weakness within a short time should prompt early veterinary contact instead of waiting for heavy losses.
- A disease outbreak is suspected in the area or a nearby farm.
Early Recognition of Abnormal Signs and Initial Handling in the House

Signs That Chicks Are Too Cold or Too Hot and How to Adjust Temperature in Time
Chicks are too cold:
- They crowd tightly near the heat source and may pile on top of each other.
- They chirp loudly, tremble, and move little.
Action: Lower the brooder lamp or add another heat source. Check to ensure there are no drafts entering the house.
Chicks are too hot:
- They move away from the heat source and gather at the edge of the brooding area, breathing with open mouths.
- They spread their wings and drink unusually large amounts of water.
Action: Raise the brooder lamp, increase gentle ventilation, and recheck the thermometer.
Temperature adjustments should be made in small steps, around 1–2°C each time. Avoid sudden changes because chicks are highly sensitive to temperature fluctuations.
Signs of Diarrhea, Pasty Vent, and Omphalitis in Newly Hatched Chicks and Initial Handling
White or yellow diarrhea: Immediately check whether drinking water is dirty, feed is damp or moldy, and the house temperature is too low. If many chicks are affected at the same time, contact a veterinarian immediately.
Pasty vent: Use a warm, damp cloth to gently clean the area around the vent so the chick is not blocked. This is often a sign of mild diarrhea or post-transport stress.
Omphalitis: The navel is swollen, red, has an odor, or produces discharge. Separate affected chicks from the flock immediately and contact a veterinarian for handling guidance. Do not squeeze or press the navel area.
Principle: Do not use antibiotics on your own without identifying the cause of disease or consulting a veterinarian.
Antibiotics do not work against viral diseases such as Newcastle, Gumboro, or Marek’s disease. Antibiotic use in chicks should follow veterinary instructions, with the correct type, dose, duration, and withdrawal period for food-producing animals.
Farmers should not use antibiotics without identifying the cause, because incorrect use may increase the risk of antimicrobial resistance, affect the developing gut microbiota of chicks, and make future disease control more difficult.
Respiratory Signs: Wheezing, Open-Mouth Breathing, and Principles for Isolation and Monitoring Weak Chicks
Open-mouth breathing, wheezing, frequent sneezing, or stretching the neck while breathing may indicate respiratory disease.
Check immediately:
- House temperature
- Ventilation
- Drafts
- Whether litter is damp
- Whether ammonia smell in the house is strong
Separate chicks with respiratory signs into a separate area immediately to reduce the risk of spread. Monitor disease progression and contact a veterinarian if the number of affected chicks increases or deaths occur.
Weak chicks that cannot stand properly or cannot reach feeders and drinkers should be separated and cared for individually.
Some weak chicks may recover if supported early by keeping them warm, helping them access drinking water and feed, and monitoring them closely. If chicks do not improve or show signs suggesting infectious disease, they should remain isolated and a veterinarian should be contacted to assess the cause. Avoid mass treatment or medicating the flock without a clear conclusion.
Common Mistakes in Disease Prevention for Newly Hatched Chicks
Farmers — especially beginners — often make the basic mistakes below. Recognizing these mistakes helps prevent losses much more effectively:
- Not preparing and pre-warming the brooding area before chicks arrive: Placing chicks into a cold house immediately after transport may cause severe thermal shock.
- Allowing direct drafts into the brooding area: Even if the thermometer shows an adequate temperature, drafts may cause localized chilling and increase the risk of respiratory disease.
- Not changing water often enough: Dirty water or water contaminated with droppings is a direct source of bacterial transmission.
- Leaving leftover feed for too long: Damp or moldy feed is a common risk factor for diarrhea and digestive disorders in chicks.
- Excessive stocking density: This increases local heat, ammonia levels, disease transmission risk, and trampling.
- Skipping the vaccination schedule or applying vaccines incorrectly: Vaccines may not work effectively, and the flock may not develop immunity at the required time.
- Sudden changes in feed or drinking water: These can cause digestive disturbance, especially during the first week.
- Using antibiotics too early and not according to a proper protocol: This does not solve viral diseases, may affect the effectiveness of live vaccines, and increases the risk of antimicrobial resistance.
- Not observing the flock frequently: Disease and abnormal signs in chicks can progress within hours. The flock should be observed several times a day, especially during the first week — for example, at least 2–3 times — to detect problems earlier.
Disease Prevention for Newly Hatched Chicks: Practical 14-Day Checklist
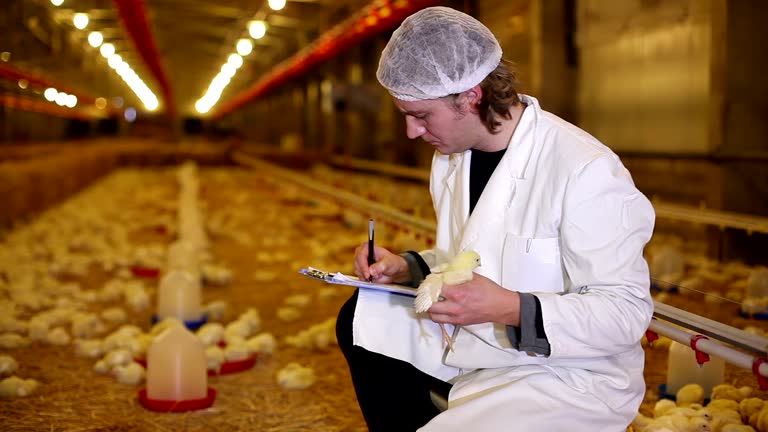
Checklist Before Chicks Arrive: House, Thermometer, Brooder Lamp, Feeders, and Drinkers
- The brooding area has been cleaned, washed, and disinfected at least 48 hours before chick arrival.
- New, dry, clean litter has been spread evenly at a thickness of 5–8 cm.
- Brooder bulbs or infrared lamps have been installed, checked, and adjusted to the appropriate height.
- A thermometer has been placed low, close to the litter surface, and test temperature has been measured.
- Drinkers have been washed, disinfected, dried, and are ready for water.
- Feeders or feeding trays are prepared in sufficient quantity.
- Brooder rings and circular draft shields are properly positioned.
- Electrolytes, vitamins, and probiotics are available if needed.
- A local veterinarian has been contacted to confirm the vaccination schedule.
Daily Checklist During the First 7 Days
- Check house temperature and observe chick behavior, including crowding or spreading, to adjust heat.
- Replace water and clean drinkers at least twice.
- Check feeders, remove old leftover feed, and provide fresh feed.
- Observe the color and condition of droppings.
- Check litter, loosen it if caked or damp, and add dry rice husk if needed.
- Check the flock for weak chicks, diarrhea, pasty vent, omphalitis, or abnormal signs.
- Separate weak or sick chicks into another area if detected.
- Vaccinate on the correct day according to the schedule confirmed with a veterinarian if day 5–7 vaccination is due.
- Record any deaths, suspected causes, and abnormal signs.
Daily Checklist During the Second Week
- Continue monitoring temperature and gradually reduce it according to stage, around 28–31°C.
- Replace water and clean drinkers at least twice per day.
- Check and remove leftover feed, and feed small amounts several times.
- Expand the brooder ring or housing area if needed based on flock density.
- Add feeders and drinkers if chicks are growing well.
- Observe the flock several times per day: feeding, drinking, behavior, and droppings.
- Vaccinate according to schedule if there is a dose in the second week, as confirmed by a veterinarian.
- Spray disinfectant outside the house according to a frequency suitable for disease risk.
- Record flock condition daily.
Reference Summary Table by Age: Days 1–3 / Days 4–7 / Days 8–14
The parameters below are for reference only for common production models. They should be adjusted according to breeder recommendations, the actual housing system, and the guidance of the local veterinarian.
| Item | Days 1–3 | Days 4–7 | Days 8–14 |
| Temperature under heat source | 33–35°C | 31–33°C | 28–31°C |
| Temperature at brooding area edge | 28–30°C | 26–28°C | 24–26°C |
| Reference lighting | ~23 hours/day | ~18–20 hours/day | ~18 hours/day |
| Suggested density | 25–30 chicks/m² | 20–25 chicks/m² | 15–20 chicks/m² |
| Drinking water | Prioritize clean, cool, accessible water; electrolytes/vitamins may be considered after transport if needed | Continue clean water; use support products only when the flock is stressed, eating poorly, or according to guidance | Maintain clean water; probiotics/vitamins should only be used when there is a clear reason and according to product instructions |
| Feed | Spread thinly on paper/trays | Gradually switch to feeders | Specialized feeders |
| Supportive supplementation | Electrolytes and vitamins may be considered according to product instructions | Do not overuse; monitor droppings, intake, and flock behavior | Do not use mechanically as a routine; prioritize hygiene, temperature, feed, and basic management |
| Vaccines | None, except Marek’s at the hatchery | Newcastle/Gumboro if included in the farm vaccination program and recommended by a veterinarian or chick supplier | Newcastle booster if required by the schedule |
| Hygiene focus | Drinkers and litter | Feeders, drinkers, and litter | Full-house hygiene and periodic disinfection |
| Special monitoring | Navel, temperature, drinking behavior | Droppings, feeding, diarrhea | Respiratory signs, growth, flock behavior |
FAQ: Common Questions About Disease Prevention for Newly Hatched Chicks
What Should I Do First If Newly Hatched Chicks Arrive Weak and Unsteady?
Place chicks into a pre-warmed brooding area and provide clean water immediately when they are placed in the brooder. Electrolytes may be considered if chicks have been transported over long distances, show signs of stress, or if product instructions recommend it. If chicks need help drinking, gently bring their beaks close to the drinker. Avoid rough handling or moving chicks too much.
Monitor them during the first few hours. If chicks recover and begin moving, eating, and drinking well, the cause may often be post-transport stress. If chicks remain weak, cannot stand, or show other abnormal signs, contact a veterinarian promptly for advice.
Why Do Many Chicks Die in the First Week Even When They Are Kept Warm and Given Enough Feed and Water?
Several causes may not be immediately visible: poor chick quality from the hatchery due to breeder egg or incubation problems, omphalitis or bacterial infection from hatching, drinking water or feed contamination even when they appear clean, or excessive stocking density causing trampling or local oxygen shortage.
Some viral diseases such as Gumboro and Marek’s disease may cause greater losses at later stages if the vaccination program is not suitable. It is important to distinguish these causes clearly to avoid misdiagnosis. Farmers should record the time of death, signs before death, and report them to a veterinarian to identify the specific cause.
How Should Pasty Vent or Diarrhea in Chicks Be Handled, and When Is Medicine Needed?
First, gently clean the pasted vent area with a warm, damp cloth. Then recheck house temperature, drinking water quality, feed quality, and litter condition.
If only a few chicks are affected and there are no other abnormal signs, they may be monitored further after temperature, water, feed, and litter have been checked. Probiotics should only be considered if appropriate for the flock condition and used according to product instructions.
If the number of chicks with diarrhea increases quickly, droppings become abnormal in color such as cloudy white, green, or bloody, or chicks stop eating and die, contact a veterinarian before deciding to use medicine.
Should Brooder Lights Be Kept On Overnight, and When Should Lighting Be Reduced?
During the first 3 days, lighting should generally be maintained almost continuously, around 23 hours per day according to many practical guidelines, so chicks can easily find feed and water. During this stage, brooder lights provide both light and heat, so they should not be turned off completely.
From days 4–7 onward, lighting may be reduced to around 18–20 hours per day. This should be adjusted according to breeder guidance and the specific production model. Heat sources should still be maintained continuously during the first 2 weeks if the natural house temperature is not sufficient.
When Should Antibiotics Be Used for Chicks, and What Should Be Noted to Avoid Overuse?
Antibiotics are effective only against bacterial diseases. They do not work against viral diseases such as Newcastle, Gumboro, or Marek’s disease. Therefore, antibiotic use should follow veterinary instructions, with the correct type, dose, duration, and withdrawal period before market age.
Antibiotics should not be used without identifying the cause of disease. Incorrect antibiotic use increases the risk of antimicrobial resistance and may suppress the developing gut microbiota of chicks.
Why Do Chicks Stop Eating, Huddle in Corners, and Fluff Their Feathers Even Without Fever? What Should Be Done?
These are often signs that chicks are cold, stressed, or experiencing mild digestive problems. Immediately check house temperature, drafts, drinking water quality, and feed quality.
If environmental conditions are correct but chicks do not improve after 4–6 hours, or if the number of affected chicks increases, isolate affected chicks and contact a veterinarian for further assessment. Avoid using multiple medicines at the same time before the cause is clear.
Reduce Brooding-Stage Losses with Effective Livestock Solutions at VIETSTOCK 2026
Disease prevention for newly hatched chicks during the first 2 weeks is not only about using medicines or vaccines. It is an integrated process that includes brooding preparation, temperature control, hygiene and disinfection, nutrition, drinking water, biosecurity, and daily monitoring of abnormal signs. This is also an important stage that helps farmers reduce losses, stabilize flock health, and build a strong foundation for the entire production cycle.
VIETSTOCK 2026 will serve as a specialized connection platform for farmers, farm owners, veterinarians, chick suppliers, veterinary medicine providers, vaccine providers, biological product providers, brooding equipment suppliers, environmental control system providers, and biosecurity solution providers. The event is expected to bring together more than 300 brands, over 10,000 m² of exhibition area, and 13,000 trade visitors from more than 40 countries and territories. It will create opportunities to update solutions that help improve survival rates, control disease, and develop more sustainable poultry production.
During the first 14 days, farmers need more than medicines or vaccines. They also need solutions that help manage brooding conditions, drinking water, nutrition, hygiene, biosecurity, and daily chick monitoring. The Vietnam Pavilion at VIETSTOCK 2026 gives Vietnamese companies a focused channel to showcase breeding stock, brooding equipment, temperature and ventilation control systems, electrolytes, vitamins, probiotics, biological products, and biosecurity solutions designed for the early stage of poultry production.
With support from the Department of Animal Health and Production, companies participating in the Vietnam Pavilion may benefit from preferential participation support of up to 45%. This creates a practical opportunity for local suppliers to reach farm owners, distributors, veterinarians, and partners seeking solutions that reduce chick losses, stabilize flock health, and improve poultry production efficiency from the first days.
At VIETSTOCK 2026, attendees can:
- Update solutions for brooding systems, temperature control, ventilation, hygiene, disinfection, and biosecurity for chicks.
- Meet suppliers of breeding stock, veterinary medicines, vaccines, electrolytes, vitamins, probiotics, and poultry health support products.
- Learn about proactive disease prevention trends during the first 14 days to reduce losses and improve farming efficiency.
- Connect with experts, businesses, and partners across the poultry production, animal health, feed, farm equipment, production, and processing value chain.
- Explore opportunities to participate in the Vietnam Pavilion to strengthen brand visibility and expand international B2B connections.
Date: 21–23 October 2026
Venue: Saigon Exhibition and Convention Center (SECC), 799 Nguyen Van Linh Street, Ho Chi Minh City, Vietnam
Event website: https://www.vietstock.org/en/
Visitor registration: https://www.vietstock.org/en/online-registration-2/
If your business provides solutions in breeding stock, veterinary medicines, vaccines, biological products, brooding equipment, environmental control systems, biosecurity, or poultry health management, VIETSTOCK 2026 is an opportunity to gain visibility among the professional poultry and livestock industry community, connect directly with potential customers, and expand partnerships across the livestock value chain.
👉 Book a stand at VIETSTOCK 2026 today to take advantage of a central location, available participation incentives, and global connection opportunities.
Contact:
- Exhibiting: Ms. Sophie Nguyen – [email protected]
- Visitor Support: Ms. Phuong – [email protected]
- Marcom Support: Ms. Anita Pham – [email protected]