Medicine and Vaccine Injection Sites in Chickens: Subcutaneous Injection, Intramuscular Injection, and Technical Notes
A practical guide to chicken injection sites for medicines and vaccines, covering subcutaneous and intramuscular injection, needle sizes, preparation, common mistakes, and post-injection monitoring.

Choosing the correct chicken injection sites is a fundamental part of poultry health management. It directly affects medicine absorption, immune response after vaccination, and the safety of birds within the flock.
Some poultry farms fail in disease prevention not only because of vaccine selection or vaccine quality, but also due to vaccination schedules, storage conditions, flock health status, pathogen pressure, biosecurity, and technical errors such as using the wrong route, injecting at the wrong site, or performing the injection incorrectly.
The article explains key technical principles for the two main injection routes in chickens: subcutaneous injection and intramuscular injection. It covers commonly used injection sites, needle angle, reference needle sizes, vaccine preparation procedures, common mistakes to avoid, and post-injection monitoring notes.
The content is presented from a practical reference perspective, helping farmers, farm technicians, and flock care staff understand the principles of choosing injection sites, performing injections safely, and avoiding common errors.
Decisions on vaccine type, medicine, dosage, injection route, withdrawal period, and how to handle abnormal reactions must follow the product label, current regulations, and recommendations from a veterinarian.
Quick Summary
- Subcutaneous injection is commonly used for some vaccines and medicines that require slower absorption. The most common site is the loose skin at the back of the neck or nape area.
- Intramuscular injection is usually indicated in some cases where faster absorption is needed or when the product is designed for intramuscular use.
- Examples may include certain injectable medicines, vitamins, or veterinary products according to manufacturer instructions and veterinary guidance. Farmers should not switch medicines or vaccines to the intramuscular route if the product label does not recommend it.
- Needle size, injection angle, and injection speed should be adjusted according to the injection route and the age of the bird to avoid injury and product loss.
- Common mistakes include injecting too shallowly, using dirty or blunt/bent needles, injecting too quickly, and failing to replace needles regularly according to the farm’s veterinary protocol.
- All decisions about vaccine type, injection protocol, and management of serious complications should be made in consultation with a qualified veterinarian.
- The choice of chicken injection sites depends on the product label, injection route, bird age, muscle development, and veterinary guidance.
Why Does Injecting at the Correct Site Determine Medicine Effectiveness and Flock Safety?
Each medicine and vaccine has a different absorption mechanism depending on the route of administration. When injected into the recommended tissue layer, the product can diffuse and be absorbed at the appropriate rate, helping the active ingredient reach the required level in the blood or at the target site.
In contrast, injecting into the wrong site or wrong tissue layer may increase the risk of several consequences:
- If a vaccine or medicine is delivered into the wrong tissue layer compared with the recommendation, its absorption rate, absorption level, and immune response may be affected.
- If certain medicines are accidentally injected into a blood vessel instead of muscle, the risk of serious pharmacological reactions may increase and may even lead to death in chickens.
- If the needle or medicine damages nerves such as the sciatic nerve, chickens may show temporary leg paralysis, or in some severe cases, longer-lasting problems.
- Injecting too shallowly may cause the medicine to leak out through the skin, resulting in dose loss, waste, and reduced disease prevention or treatment effect.
- Injecting in neck areas with many blood vessels and sensitive structures, especially when technique or hygiene is poor, may increase the risk of bleeding, tissue damage, infection, or local abscesses.
In addition to disease prevention and treatment effectiveness, the correct injection site also affects meat quality and animal welfare. Poor intramuscular injection technique in the breast muscle, especially with certain products such as oil-emulsion vaccines, may increase the risk of lumps or local tissue lesions, which can affect commercial value.
In short, chicken injection sites are not just a technical detail. Selecting the correct site helps determine whether an injection works as intended.
Chicken Injection Sites: Subcutaneous vs Intramuscular Injection

When to Choose Subcutaneous Injection for Chickens
Subcutaneous injection, abbreviated as SC or SQ, means delivering the product into the space between the skin and the underlying muscle. This tissue layer contains loose connective tissue and small blood vessels, allowing the product to be absorbed more gradually and steadily than with intramuscular injection.
Subcutaneous injection is commonly used or recommended in the following cases:
- Some live attenuated vaccines or inactivated water-based vaccines are designed for subcutaneous injection to allow slower and more stable absorption, but the specific route of administration must follow the instructions for each product.
- Some veterinary medicines are indicated by the manufacturer for subcutaneous use to allow slower absorption or prolonged action. However, farmers should not guess the route of administration based only on the type of medicine. They need to read the product label carefully and consult a veterinarian before use.
- In newly hatched chicks or very small chickens, the muscles are thin, making intramuscular injection more difficult and increasing the risk of tissue injury. Therefore, subcutaneous injection is often preferred according to product instructions.
- Marek’s disease vaccine is commonly administered subcutaneously in one-day-old chicks.
When selecting chicken injection sites, farmers should follow the recommended injection route stated in the official product instructions. These instructions should be reviewed carefully before choosing an injection route.
When to Choose Intramuscular Injection for Chickens
Intramuscular injection, abbreviated as IM, means delivering the product directly into muscle tissue. Muscle has a denser capillary network than subcutaneous tissue, so products are often absorbed more quickly and reach blood levels earlier.
Intramuscular injection is usually indicated when:
- Faster absorption is needed, or the product is designed for intramuscular use.
- Examples may include certain injectable medicines, vitamins, or veterinary products according to manufacturer instructions and veterinary guidance. Farmers should not switch medicines or vaccines to the intramuscular route if the product label does not recommend it.
- Oil-emulsion vaccines, such as oil-based Newcastle disease vaccines or oil-based H5 avian influenza vaccines, are often administered intramuscularly or subcutaneously depending on the specific product.
- Some suspension or oil-emulsion products may irritate tissues if used through the wrong injection route.
However, the route of administration cannot be determined only by the dosage form. Some oil-emulsion products are designed for intramuscular injection, while others may be indicated for subcutaneous injection. The safest approach is to follow the instructions for each specific product.
Note: Not all oil-based vaccines are injected intramuscularly. Some oil-based vaccines are designed for subcutaneous injection. The instructions for each product must be checked carefully.
Quick Comparison Table: Subcutaneous and Intramuscular Injection in Chickens
| Criteria | Subcutaneous Injection | Intramuscular Injection |
| Injection site | Nape area, back of the neck, neck skin fold | Outer thigh muscle, breast muscle |
| Absorption speed | Slow and steady | Faster |
| Suitable products | Vaccines/medicines indicated by the manufacturer for subcutaneous use | Vaccines/medicines indicated by the manufacturer for intramuscular use |
| Main risks | Injecting into the skin instead of under the skin; subcutaneous swelling | Nerve or blood vessel injury; impact on meat quality |
| Suitability for chicks | High | Requires more caution because muscles are small |
| Impact on meat quality | Low | May leave marks if performed incorrectly |
Subcutaneous Chicken Injection Sites and Correct Technique
For subcutaneous administration, the most common chicken injection sites are the loose skin at the nape and the back of the neck.
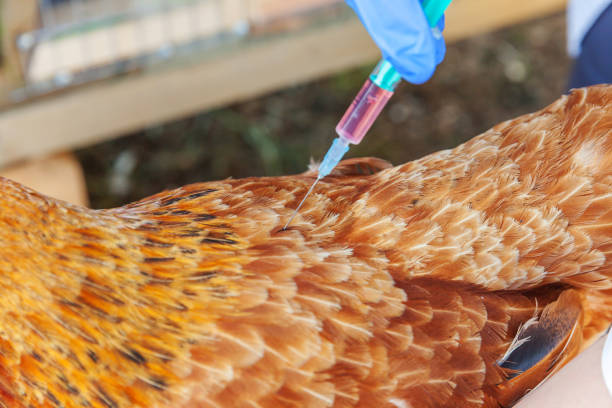
Nape and Back of the Neck: The Most Common Subcutaneous Injection Site
Among subcutaneous chicken injection sites, the nape area, or the back of the neck just above the shoulders, is one of the most commonly used because:
- The skin in this area is relatively loose and easy to lift to form a skin fold.
- There are fewer large blood vessels and important nerves compared with other areas.
- It is easy to access while holding the bird with one hand.
- It has less impact on commercially valuable muscle areas.
In some practical guidelines, the skin under the wing may also be mentioned as an alternative subcutaneous injection site. However, the back of the neck is still commonly preferred because it is easier to handle under farm conditions.
Farmers should avoid injecting into the front of the neck, under the chin, near the larynx, or around the head because these areas carry a higher risk of damaging important structures.
How to Identify the Skin Fold and the Correct Subcutaneous Layer
Before injection, the person performing the procedure should identify the correct subcutaneous layer by:
- Gently lifting the skin at the nape using the thumb and index finger to create a clear “skin tent.”
- Observing the space between the skin and the muscle underneath. This is the subcutaneous space.
- If the skin is too tight and cannot be lifted, the bird may be dehydrated or under stress, and the timing of injection should be reconsidered.
- Feeling the difference between thin, soft skin and the firmer, thicker muscle underneath.
Correctly identifying the skin fold is the most important step to ensure that the needle enters the subcutaneous space, does not penetrate into the muscle, and does not stop only within the epidermal layer.
Needle Angle, Needle Depth, and Injection Method for Subcutaneous Injection
- Needle angle: Insert the needle under the skin fold at a shallow angle, usually around 15–30 degrees relative to the skin surface. The goal is to place the needle tip in the subcutaneous tissue, not deep into the muscle.
- Needle depth: Depth depends on bird size, skin thickness, injection site, needle length, and product instructions. For small chickens, the needle should be inserted shallowly. For larger birds, the depth may need adjustment, but no single fixed number should be applied mechanically.
- Check before injecting: In some manual injection procedures, the person performing the injection may aspirate/check according to veterinary protocol or product instructions before injecting. If blood appears or there is any suspicion that the needle has entered a blood vessel, stop, withdraw the needle, and choose another site.
- Injection method: Inject the medicine or vaccine slowly and steadily. If the product is correctly injected under the skin, a small swelling may appear at the injection site. However, this sign does not replace proper identification of the injection site and route.
- Needle withdrawal: Withdraw the needle quickly but gently along the same direction as insertion. After withdrawal, clean cotton or gauze may be used to gently dab the site if there is slight bleeding or leakage. Do not squeeze or massage the injection site strongly, as this may increase irritation or cause the product to flow back out.
Note: Do not change the injection route, dosage, or injection site if the product label does not recommend it. For vaccines, treatment medicines, or flocks showing abnormal signs, consult a veterinarian or an experienced technician.
Suitable Needle Sizes for Subcutaneous Injection in Chicks and Older Chickens
Needle size is indicated by gauge (G). The higher the gauge number, the smaller and thinner the needle. The table below provides common reference needle sizes in practice. These should be checked against the specific instructions from the vaccine or medicine manufacturer.
| Bird Group | Reference Needle Size | Needle Length | Notes |
| Chicks 2–4 weeks old | 23G–25G | 5/8 inch | Use a smaller needle, handle gently, and avoid inserting too deeply |
| Pullets 5–15 weeks old | 21G–23G | 5/8–1 inch | Adjust according to muscle mass and the product being injected |
| Adult layers and broilers | 20G–22G | Around 1 inch | Do not choose an overly large needle without professional guidance |
| Oil-emulsion vaccines or high-viscosity products | According to product recommendation | According to product recommendation | Follow manufacturer instructions; do not guess based only on dosage form |
For subcutaneous injection, smaller needles, meaning higher G numbers, are preferred to reduce pain and reduce the risk of skin tearing. However, needles that are too small may make it difficult to inject high-viscosity oil-emulsion vaccines.
Farmers should refer to the vaccine manufacturer’s instructions for the appropriate needle size for each specific product.
Common Mistakes in Subcutaneous Injection and How to Avoid Them
- Piercing through the skin: This may happen when the skin fold is not lifted before injection or when the needle is inserted too quickly. To avoid this, always lift the skin fold first, insert the needle slowly, and pay attention to the feel of the needle.
- Injecting into muscle instead of under the skin: This is often caused by an overly steep needle angle, usually more than 45 degrees. To avoid this, maintain a shallow angle of around 15–30 degrees.
- Product leaking out: This may happen when the needle is withdrawn too slowly after injection or when the skin at the site is too thin. To avoid this, withdraw the needle quickly and decisively after injection.
- Unusually large swelling at the injection site: Possible causes include injecting too quickly, injecting too much product into one point, or a local tissue reaction. Sterility and technique should be further evaluated.
Intramuscular Chicken Injection Sites and Correct Technique
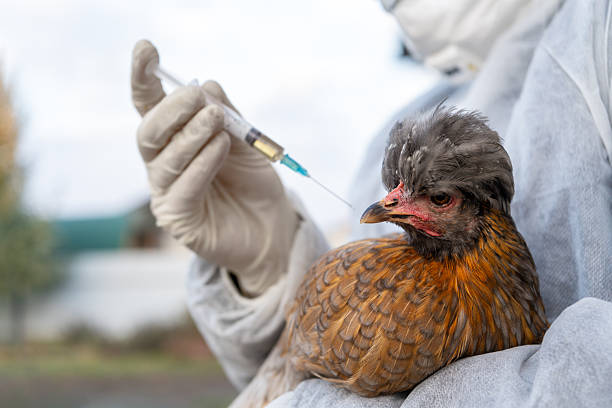
For intramuscular administration, common chicken injection sites include the outer thigh and breast muscle, depending on bird size and product instructions.
Thigh Muscle and Breast Muscle: Common Intramuscular Injection Sites and How to Choose
There are two main muscle groups commonly used for intramuscular injection in chickens:
Thigh muscle
- Site: The outer side of the thigh, avoiding the inner thigh where important arteries and nerves are located.
- Advantages: Easy to access, enough muscle mass even in young birds, and less impact on the high-value breast meat area.
- Suitability: Often used once birds are large enough for the thigh muscle to be injected safely. In very small chicks, the thigh muscle is still too small and thin.
Breast muscle
- Site: The muscle on both sides of the sternum, injected into the middle to lower third of the breast muscle, avoiding the tip of the sternum and the midline of the keel bone.
- Advantages: Large muscle mass and easy to identify in adult birds.
- Disadvantages: Poor injection technique may leave marks in the meat, affecting appearance and commercial meat quality.
- Suitability: Used when the breast muscle is developed enough for safe injection, often from around 4 weeks of age onward. However, this age is only a reference and should be assessed according to each flock.
Among intramuscular chicken injection sites, the outer thigh muscle is often chosen to reduce the impact on breast meat and allow better control of needle depth. However, technical recommendations from the manufacturer and the supervising veterinarian should be followed.
Areas to Avoid During Intramuscular Injection to Prevent Nerve and Blood Vessel Injury
When injecting into the thigh muscle, avoid:
- Inner thigh: This area contains the femoral artery and vein, as well as the sciatic nerve. Injecting here may damage nerves and increase the risk of leg paralysis.
- Knee joint area and lower thigh near the joint: Bone and joint tissues are close to the surface, increasing the risk of accidental injection into the joint.
When injecting into the breast muscle, avoid:
- The midline of the keel bone: This is hard bone. Injecting into it is ineffective and painful.
- The upper area near the clavicle: This area contains important blood vessels and nerves.
- Injecting too deeply through the breast muscle: In small chickens, the chest wall is thin. If the breast muscle is injected at an inappropriate depth, the needle may pass through the muscle and increase the risk of injury to the chest cavity or internal organs.
Needle Angle, Depth, and Injection Speed for Intramuscular Injection
- Needle angle and depth: The needle angle and depth for intramuscular injection should be adjusted according to the injection site, bird size, muscle thickness, needle length, injection equipment, and product instructions. A single fixed needle angle or depth should not be applied mechanically to all ages, breeds, or vaccine/medicine types.
- When injecting into the thigh muscle: Prioritize the outer thigh and avoid the inner thigh because this area contains important blood vessels and nerves. Do not insert the needle too deeply or direct it toward areas that are difficult to control.
- When injecting into the breast muscle: Avoid the midline of the keel bone, the tip of the sternum, and excessive needle depth, especially in small chickens. Anyone performing the injection should receive practical training before injecting the flock.
- Check before injecting: In some manual injection procedures, the person performing the injection may aspirate/check according to veterinary protocol or product instructions before injecting. If blood appears or there is any suspicion that the needle has entered a blood vessel, stop, withdraw the needle, and choose another site.
- Injection speed: Inject the medicine or vaccine slowly and steadily. Do not inject the entire dose too quickly. With oil-emulsion vaccines or high-viscosity products, follow manufacturer instructions to avoid applying excessive force to the plunger.
- After injection: Withdraw the needle quickly but gently along the same direction as insertion. If there is slight bleeding or leakage, clean cotton or gauze may be used to dab the injection site. Do not squeeze or massage the area strongly, as this may increase tissue irritation.
Suitable Needle Sizes for Intramuscular Injection by Bird Group
The table below provides reference needle sizes in practice. The specific needle size should be checked against manufacturer instructions, especially when using oil-based vaccines, as each manufacturer may provide its own recommendations.
| Bird Group | Reference Needle Size | Needle Length | Notes |
| Chicks 2–4 weeks old | 23G–25G | 5/8 inch | Use a smaller needle, handle gently, and avoid inserting too deeply |
| Pullets 5–15 weeks old | 21G–23G | 5/8–1 inch | Adjust according to muscle mass, injection route, and product type |
| Adult layers and broilers | 20G–22G or according to product recommendation | Around 1 inch | Do not choose an overly large needle without professional guidance |
| Oil-emulsion vaccines or high-viscosity products | According to product recommendation | According to product recommendation | Follow manufacturer instructions; do not guess based only on dosage form |
For oil-emulsion vaccines or high-viscosity products, a larger needle diameter may make injection easier and help avoid excessive force on the plunger.
However, choosing a needle that is too large may increase pain, bleeding, or tissue damage.
Therefore, the final needle size should be determined according to the instructions for each product and the farm’s veterinary protocol.
Does Intramuscular Injection Affect Meat Quality or Leave Lumps?
In most cases, when chicken injection sites are selected correctly and the proper technique and dose are used, meat damage is minimal and difficult to notice at slaughter. However, some situations may increase the risk of affecting meat quality:
- Incorrect dose or injection site with oil-based vaccines may cause a local inflammatory reaction, leading to soft tissue lumps at the injection site. These lumps may last for several weeks and affect the appearance of commercial meat.
- Giving multiple injections at the same site within a short period increases the risk of medicine accumulation and local muscle inflammation.
- Failure to follow the withdrawal period before slaughter may cause medicine residues in meat. This is not directly related to injection site, but it must be considered at the same time.
To reduce impact on meat quality, intramuscular injection into the outer thigh muscle should be prioritized over the breast muscle when possible, especially in broilers close to market age.
Common Mistakes in Intramuscular Injection and How to Avoid Them
- Injecting into the inner thigh: This usually occurs when the site is not carefully checked before injection. To avoid this, always identify the outer thigh clearly before inserting the needle.
- Injecting into bone or joint: If the needle touches a hard structure, the person injecting should withdraw it immediately and should not keep pushing. To avoid this, learn to recognize the feel of the needle entering muscle, where there should be no unusually strong resistance.
- Injecting too quickly: This causes pain, increases the risk of local reactions, and may make the bird jerk suddenly, causing the needle to move away from the correct position. To avoid this, inject slowly and steadily.
- Injecting too deeply into the breast muscle of small chickens: This may increase the risk of injury to the chest cavity or internal organs. To avoid this, adjust needle depth according to bird size and do not apply the same depth to chickens of all ages.
Preparation and Procedure for Using Chicken Injection Sites Safely
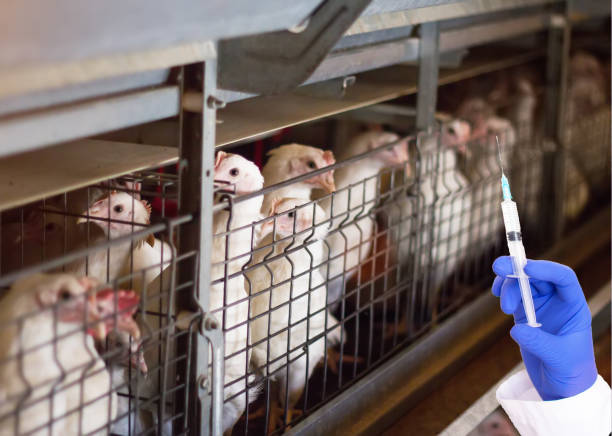
After selecting the appropriate chicken injection sites, the operator should confirm the dosage, injection route, needle size, product condition, and storage requirements.
Preparing Equipment: Needles, Syringes, Vaccine, and Disinfectant
Before starting vaccination, prepare all necessary items:
- Sterile syringes that are not expired and are not cracked or deformed.
- Needles of the correct size for the injection route and bird age, based on the needle size tables above.
- Spare needles: prepare enough needles for regular replacement or for replacement when a needle becomes bent, blunt, or contaminated.
- Vaccine should be checked before use: correct type, not expired, vial not cracked or broken, cap intact, clear batch number, and stored under the conditions stated on the label.
- Many vaccines require a cold chain of 2–8°C, but some special vaccines have different storage requirements. Therefore, do not apply one temperature range to every vaccine. Follow the instructions for each product.
- The correct diluent supplied with the vaccine, if the vaccine is freeze-dried.
- Cotton or medical gauze, and disinfectant such as 70% alcohol or diluted iodine for cleaning equipment and the injection site if needed.
- A cooler box or insulated container to keep vaccines at the correct condition throughout the vaccination process.
- A disposal bag or container for used equipment.
Proper Vaccine Storage and Reconstitution Before Injection
Vaccines are sensitive biological products. Mistakes in storage and reconstitution are common reasons why vaccines lose effectiveness even when the injection site and technique are correct.
Important notes include:
- Do not allow vaccines to freeze if they are liquid live vaccines or inactivated oil-based vaccines, unless the manufacturer allows it.
- Do not expose vaccines to direct sunlight.
- Use the correct diluent at the recommended temperature. Incorrect diluent or incorrect diluent conditions may affect vaccine potency, especially with live or attenuated vaccines. Use the supplied diluent and follow manufacturer instructions.
- Gently shake the vaccine before drawing it into the syringe according to the label, with special attention to oil-based vaccines.
- After reconstitution or opening the vial, the vaccine should be used within the time allowed on the label or package insert.
- Do not use vaccines that have exceeded the recommended time after mixing/opening, have changed color, show abnormal clumping, have an unusual smell, or are suspected to have been affected by improper storage temperature.
- Do not mix different vaccines in the same syringe unless the instructions specifically allow it.
How to Restrain and Hold Chickens Correctly During Injection
Holding chickens correctly reduces injury to the birds and improves injection accuracy.
For small chicks under 4 weeks old:
- Use one hand to gently hold the entire chick in the palm, with the chick’s head facing backward.
- Use the thumb and index finger to gently stabilize the head and neck.
- Inject with the other hand.
For larger birds receiving subcutaneous injection at the nape:
- One person may hold the bird by securing both wings under the arm or between the knees while seated, freeing both hands for injection.
- Alternatively, one person holds the bird while another performs the injection. The handler holds the neck and body, while the injector performs the procedure.
For larger birds receiving intramuscular injection in the thigh:
- Turn the bird onto its back or hold it on its side.
- Secure both legs with one hand to expose the outer thigh.
- Inject with the other hand.
Do not hold the bird so tightly that it has difficulty breathing. Do not hold it too loosely, as sudden movement during injection may cause the needle to shift.
Steps for Safe and Accurate Vaccine Injection in Chickens
Before Injection
- Check the vaccine again: vaccine name, batch number, expiry date, dosage, storage conditions, and label instructions.
- Read the manufacturer’s instructions carefully, including injection route, dosage, injection site, reconstitution method, and allowed use time after opening or mixing.
- Reconstitute or gently shake the vaccine exactly as instructed. Do not dilute, mix, or change the diluent unless the product allows it.
- Expel air from the syringe before injection.
- Hold the bird correctly and limit struggling to avoid needle displacement or tissue injury.
During Injection
- Identify the correct injection site and clean the area if needed.
- Insert the needle into the correct site and tissue layer, following product instructions or the farm’s veterinary protocol.
- Aspirate/check for blood according to the product instructions or the farm’s veterinary protocol before injecting. If blood appears or there is any suspicion that the needle has entered a blood vessel, stop, do not continue injecting, and choose another site.
- Inject the vaccine slowly and steadily, especially with oil-emulsion vaccines or high-viscosity products.
- Withdraw the needle quickly but gently along the same direction as insertion.
After Injection
- Release the bird gently and observe flock reactions during the vaccination process. Monitor any birds showing abnormal signs separately.
- Replace needles regularly according to the farm’s veterinary protocol or the equipment/vaccine manufacturer’s recommendation. Replace the needle immediately if it becomes bent, blunt, dropped on the floor, dirty, or suspected to be contaminated.
- Keep complete records: injection date, vaccine type, batch number, number of birds vaccinated, dosage, injection site, person performing the injection, and any abnormal reactions.
Note: Do not change dosage, injection route, injection site, or combine multiple vaccines unless there is guidance from the manufacturer or a veterinarian.
Common Mistakes When Selecting Chicken Injection Sites
Injecting Too Shallowly, Causing Leakage, or Too Deeply, Causing Muscle Injury
Injecting too shallowly is the most common mistake among beginners. The needle enters only the skin layer instead of reaching the subcutaneous space or muscle layer. As a result, the product accumulates under the outer skin layer, is not absorbed properly, and often leaks out when the needle is withdrawn.
Injecting too deeply during intramuscular injection, especially into the breast muscle of small chickens, may increase the risk of injury to the chest cavity or internal organs.
How to avoid it: Practice recognizing the feel of the needle passing through different tissue layers, such as skin, subcutaneous tissue, and muscle, and adjust needle depth according to the actual size of each flock.
Injecting at the Wrong Site: Into a Vein, Nerve Area, or Breast Muscle Too Close to the Keel Bone
Injecting into a vein during intramuscular injection is a serious mistake. If the medicine, especially an oil-emulsion vaccine or certain antibiotics, is delivered directly into a blood vessel, it may increase the risk of embolism, strong pharmacological reaction, or death.
Accidentally injecting into the area of the sciatic nerve during thigh injection may cause nerve injury, shown by clear limping or dragging of the leg after injection.
Injecting the breast muscle too close to the keel bone midline or too close to the tip of the sternum increases the risk of injecting into bone or thin tissue with insufficient muscle.
Using Dirty Needles, Overly Large Needles, or Not Replacing Needles Between Birds
Reusing needles that have not been sterilized may spread pathogens between birds in the flock. This source of cross-contamination is often overlooked in small farm practice.
An overly large needle, meaning a lower G number, may cause unnecessary tissue damage and increase the risk of bleeding.
Bent or blunt needles increase pain, tissue injury, and reduce injection accuracy.
As good practice, needles should be replaced regularly according to the farm’s veterinary protocol or the equipment/vaccine manufacturer’s recommendation. Needles should be replaced immediately if they are bent, blunt, dropped on the floor, dirty, or suspected to be contaminated to reduce cross-infection risk and tissue injury.
Injecting Too Quickly, Using the Wrong Dose, or Mixing Vaccine at the Wrong Ratio
Injecting too quickly creates high local pressure, causing pain, increasing tissue reaction, and pushing the product back out along the needle track when the needle is withdrawn.
Mixing vaccine at the wrong ratio, either too concentrated or too diluted, makes the actual dose per bird incorrect and may lead to uneven immunity across the flock.
Underdosing may result in insufficient immune protection. Overdosing may cause stronger vaccine reactions and increase flock stress.
Chicken Injection Sites Checklist: Before, During, and After Injection

Before Injection
- Read the vaccine/medicine instructions carefully and identify the injection route and dosage.
- Check the expiry date and vial condition. Do not use if the vial is broken or the cap is not intact.
- Store the vaccine at the correct temperature until injection.
- Prepare enough sterile needles and syringes of the correct size.
- Prepare a cooler box to keep the vaccine during the vaccination session.
- Reconstitute the vaccine at the correct ratio and with the correct diluent according to manufacturer instructions.
- Identify the injection site to be used for today’s flock.
- Provide a short briefing for the people helping to hold the birds if needed.
During Injection
- Hold the bird correctly, without restraining it too tightly.
- Identify the correct site and tissue layer before inserting the needle.
- Aspirate/check for blood according to the product instructions or the farm’s veterinary protocol before injecting.
- Inject slowly and steadily.
- Withdraw the needle decisively after injection.
- Replace needles at the recommended frequency or when a needle is bent, blunt, or contaminated.
- Occasionally swirl or gently shake the vaccine according to manufacturer instructions during the vaccination session, especially with oil-based vaccines.
- Observe the immediate reaction of birds after each injection.
After Injection
- Record the injection date, vaccine/medicine type, product batch number, number of birds injected, injection site, and person performing the injection.
- Dispose of used vaccine vials, needles, and syringes properly.
- Monitor the flock for 24–72 hours after injection.
- Record any abnormal reactions for reporting or veterinary consultation.
Monitoring Chickens After Injection and Handling Abnormal Reactions
Monitoring reactions at chicken injection sites helps farmers identify swelling, leakage, tissue injury, or other abnormal responses early.
Normal Reactions After Injection
After vaccination or injection of some medicines, chickens may show mild reactions during the first 24–48 hours. These are often normal:
- Slightly reduced feed intake on the day of injection.
- Slightly lower activity than usual.
- Mild swelling at the injection site for 1–2 days.
A separate note applies to live attenuated respiratory vaccines: after some live vaccines, a small proportion of birds may show mild disease-like signs such as slight nasal discharge or mild wheezing.
Farmers should monitor closely to distinguish normal post-injection reactions from the actual onset of disease in the flock. If uncertain, consult a veterinarian.
Abnormal Signs: Swelling, Refusal to Eat, Limping, and Severe Adverse Reactions
The following signs require attention and timely response:
- Large, red, hard swelling at the injection site that lasts unusually long compared with previous vaccination batches. This may indicate a local abscess or strong inflammatory reaction to an oil-based vaccine.
- Complete refusal to eat or drink for more than 24 hours. This is not within the normal range of reaction.
- Limping, dragging a leg, or paralysis of one leg after thigh injection. Sciatic nerve injury should be suspected.
- Difficulty breathing, continuous open-mouth breathing, or bluish discoloration. This may be a serious reaction or injection-related injury and requires urgent attention.
- Sudden death within minutes to hours after injection. The vaccine/medicine batch number should be recorded immediately and a veterinarian should be notified.
- Many birds in the flock showing the same abnormal reaction. This may indicate a vaccine quality issue, injection technique problem, or adverse vaccine reaction.
When to Contact a Veterinarian Immediately and How to Record the Injection Batch
A veterinarian should be contacted immediately when:
- The rate of abnormal reactions increases clearly compared with previous vaccination batches or expected levels, especially when many birds show severe signs.
- Sudden death occurs within 24 hours after injection.
- There is suspicion of using the wrong medicine, wrong injection route, or seriously incorrect dose.
- The vaccine or diluent shows abnormal color, odor, or physical condition.
Information to record for each injection batch:
- Date and time of injection.
- Vaccine/medicine name, batch number, manufacturing date, and expiry date.
- Manufacturer and distributor.
- Number of birds in the batch and bird age.
- Injection route and injection site used.
- Person performing the injection.
- Notes on observed post-injection reactions.
These records support traceability when incidents occur and serve as evidence in flock health management.
FAQ: Chicken Injection Sites and Safe Techniques
Is Subcutaneous or Intramuscular Injection Better for Vaccine Immunity in Chickens?
There is no injection route that is absolutely better in all cases. Immune effectiveness depends on the biological characteristics of each vaccine. Manufacturers design vaccines to perform optimally through a specific route.
Some water-based live attenuated vaccines work well through the subcutaneous route. Some oil-emulsion vaccines provide stable immune responses through intramuscular or subcutaneous injection depending on the product.
The injection route should be based on the manufacturer’s instructions and should not be changed from the recommendation.
How Are Chicken Injection Sites for Newly Hatched Chicks Different From Those for Adult Chickens?
Newly hatched one-day-old chicks have very small and thin muscles, making intramuscular injection difficult and increasing the risk of tissue injury. Subcutaneous injection in the back of the neck or nape skin fold is often preferred according to product instructions.
Needles used for chicks should be smaller and must follow the vaccine or injection equipment recommendation. Needle sizes commonly mentioned in practice should be treated only as initial references and should not be applied mechanically to every vaccine or injection system.
Adult chickens offer more options for injection site and route. With chicks, the procedure must be gentler and the injection site must be checked carefully because the boundaries between tissue layers are much thinner than in larger birds.
What Should Be Done If a Chicken Is Injected at the Wrong Site or Into a Blood Vessel?
If blood is seen when aspirating/checking before injection, withdraw the needle immediately and do not inject. Wait a few seconds for the small bleeding point to stop, then choose a new injection site at least 1–2 cm away from the previous site.
If there is suspicion that medicine or vaccine has already been injected into a blood vessel, stop the injection process, separate the bird for close monitoring, and contact a veterinarian or the product supplier immediately, especially if an oil-emulsion vaccine or a product with a high risk of strong reaction was used.
Record the product name, batch number, dose used, injection time, and signs observed after injection to support traceability and response.
Abnormal signs such as paralysis, difficulty breathing, or trembling require urgent attention and immediate veterinary contact. Record the medicine or vaccine that was administered and provide this information to the veterinarian.
Can Multiple Vaccines Be Injected at the Same Site in a Chicken?
In general, multiple vaccines should not be injected at the same site on the same day unless there is specific guidance from the manufacturer or veterinary guidance.
Injecting multiple products into the same site may cause stronger local tissue reactions and may affect the effectiveness of each vaccine due to local immune interactions.
If multiple vaccines need to be administered on the same day, they should be injected at different body sites, and veterinary advice should be sought regarding order of priority and spacing between injections.
What Needle Size Is Suitable for Subcutaneous and Intramuscular Injection in Chickens?
The appropriate needle size depends on bird age, injection site, injection route, vaccine or medicine viscosity, injection equipment, and manufacturer instructions. Needle size should not be selected only based on general experience, especially with oil-emulsion vaccines or high-viscosity products.
| Case | Needle Selection Principle | Notes |
| Subcutaneous injection | Usually uses a smaller needle suitable for bird size and subcutaneous tissue | Smaller birds require gentler handling and shallow insertion |
| Intramuscular injection | Needle size should match muscle mass, injection site, and product type | Do not choose an overly large needle without specific recommendation |
| Oil-emulsion vaccines or high-viscosity products | May require a larger needle than water-based vaccines | Follow manufacturer instructions to avoid pain, bleeding, or tissue injury |
| Chicks or small birds | Require a small needle and gentle handling | Needle size must be checked against the vaccine, injection equipment, and veterinary protocol |
Needle sizes commonly mentioned in practice should be treated only as initial references. When injecting vaccines or veterinary medicines, farmers need to check the product label, package insert, and the farm’s veterinary protocol before choosing a needle.
Should Farmers Inject Vaccines in Chickens Themselves If They Have Not Been Trained?
Farmers should not inject vaccines or medicines in chickens without training on injection site, injection route, dosage, vaccine storage, needle handling, and post-injection monitoring.
For large flocks, oil-emulsion vaccines, treatment medicines, or situations with a higher risk of abnormal reactions, farmers should ask a veterinarian or experienced technician for direct guidance.
How Long After Injection Can Chickens Be Sold or Eggs Be Used?
The time before marketing chickens or using eggs after injecting medicine depends on the medicine type, active ingredient, route of administration, dosage, and the product label.
Farmers must follow the withdrawal period stated by the manufacturer and current regulations to reduce the risk of medicine residues in meat or eggs. The withdrawal period should not be shortened without professional indication.
Connect With Poultry Vaccination and Flock Care Solutions at VIETSTOCK 2026
Selecting and using the correct chicken injection sites is an important part of flock health management. It helps improve disease prevention effectiveness, reduce post-injection injury, and lower production risks.
As the poultry sector increasingly moves toward biosecurity, responsible medicine use, and preventive disease control, farmers and businesses need greater access to veterinary solutions, vaccines, supporting equipment, and effective flock management procedures.
VIETSTOCK 2026 will serve as a specialized connection platform for farmers, farm owners, veterinarians, vaccine suppliers, veterinary medicine providers, biological product providers, livestock equipment suppliers, and biosecurity solution providers.
The event is expected to bring together more than 300 brands, over 10,000 m² of exhibition area, and 13,000 trade visitors from more than 40 countries and territories, offering opportunities to update new trends in animal health management and sustainable livestock development.
For Vietnamese companies supplying vaccines, veterinary medicines, injection tools, on-farm handling equipment, or poultry health management solutions, the Vietnam Pavilion at VIETSTOCK 2026 provides direct access to a highly specialized audience. It allows exhibitors to present solutions that help poultry farms standardize vaccination procedures, reduce technical errors, improve vaccine performance, and monitor flock health after injection.
Through support from the Department of Animal Health and Production, companies participating in the Vietnam Pavilion may benefit from preferential participation support of up to 45%. This support enables local exhibitors to optimize participation costs while connecting with farm owners, veterinarians, distributors, and partners seeking practical solutions for poultry health management.
At VIETSTOCK 2026, attendees can:
- Update new solutions in vaccines, veterinary medicines, biological products, and biosecurity for poultry production.
- Meet suppliers of equipment, veterinary tools, and solutions that support on-farm vaccination procedures.
- Learn about preventive chicken flock health management, reduced disease risks, and responsible medicine use.
- Connect with experts, businesses, and partners across the poultry value chain.
- Explore opportunities to participate in the Vietnam Pavilion to strengthen brand presence and expand international B2B connections.
Date: 21–23 October 2026
Venue: Saigon Exhibition and Convention Center (SECC), 799 Nguyen Van Linh Street, Ho Chi Minh City, Vietnam
Event website: https://www.vietstock.org/en/
Visitor registration: https://www.vietstock.org/en/online-registration-2/
If your business provides solutions in vaccines, veterinary medicines, vaccination tools, livestock equipment, biosecurity, or poultry health management, VIETSTOCK 2026 is an opportunity to gain visibility among the professional poultry and livestock industry community, connect directly with potential customers, and expand cooperation across the livestock value chain.
👉 Book a stand at VIETSTOCK 2026 today to take advantage of a central location, available participation incentives, and global connection opportunities.
Contact:
- Exhibiting: Ms. Sophie Nguyen – [email protected]
- Visitor Support: Ms. Phuong – [email protected]
- Marcom Support: Ms. Anita Pham – [email protected]